Say hello to the new Mud Monkey (Long overdue updates on P8)

Driving a shiny 91 Delica Super Exceed? This is the section to show and tell!
Mystery Machine
Posts: 510
Joined: Fri Dec 08, 2006 12:06 pm
Location: Bristol (UK)

Re: Say hello to the new Mud Monkey (this one is for keeps!)

Post by Mystery Machine »

Right - there has been no proper updates for 2 whole weeks....and that is because I have been a 'little bit' busy on a major part of the Mud Monkey project (along with lots & lots of other bits & pieces)

The major part of the current work is 98% finished now, so I thought it time to post a run-down of what I've been up to! Tackling the interior.

Because of my job I need to keep the interior as a van, as functional as possible and as practical as possible. The last Mud Monkey had the floor boarded with ply which was very handy, but I wanted to go one stage further with this interior.

To cut a long LONG story short, I started out with the intention to board the back out with a few 'tie-down' points added in for securing loads, but one thing led to another and I ended up creating a major MAJOR refit which actually took me over 100hrs to complete rather than the 8 or 9 hours I'd originally anticipated.

The following photos do NOT show the amount of work, measuring, research, measuring, swearing, measuring, cutting, measuring, templating, measuring, fabricating, measuring, trimming etc....it took to complete this interior (did I meantion about the amount of measuring?? :shock: )

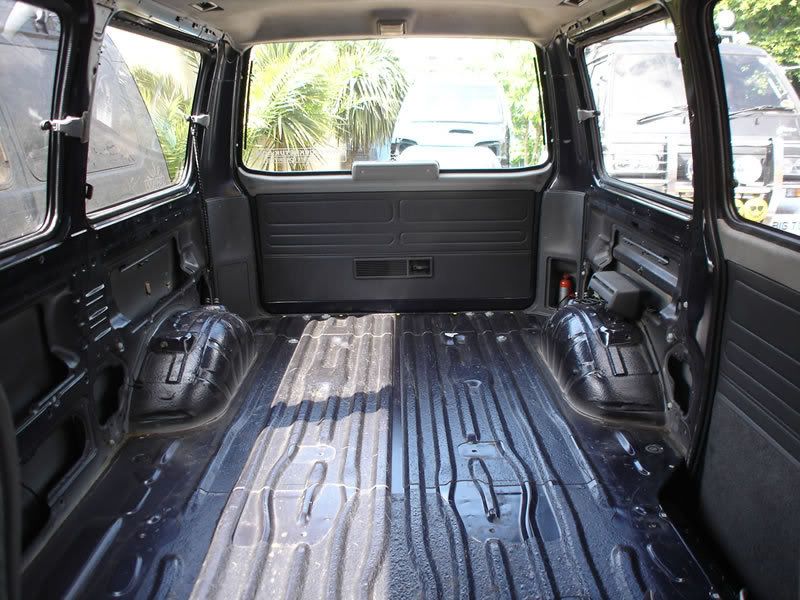
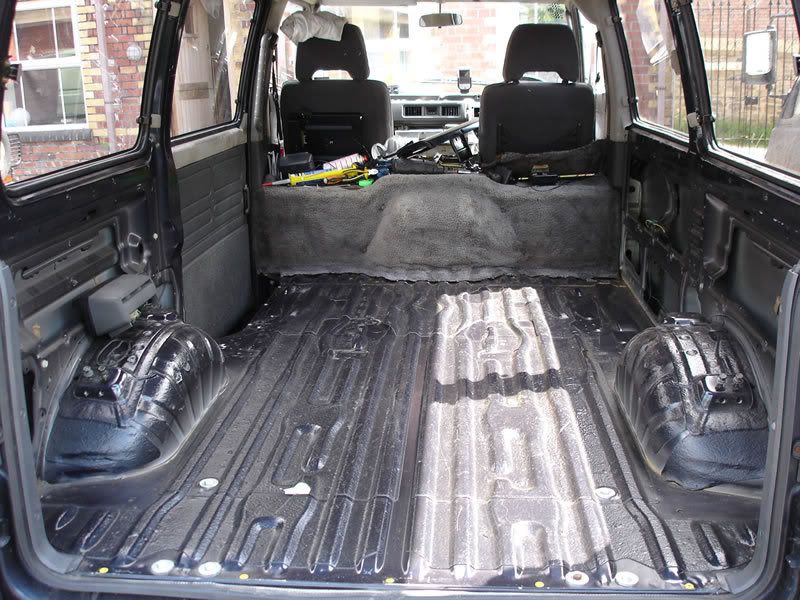
The starting point - a stripped out L300 7 seater interior:
Image
Image

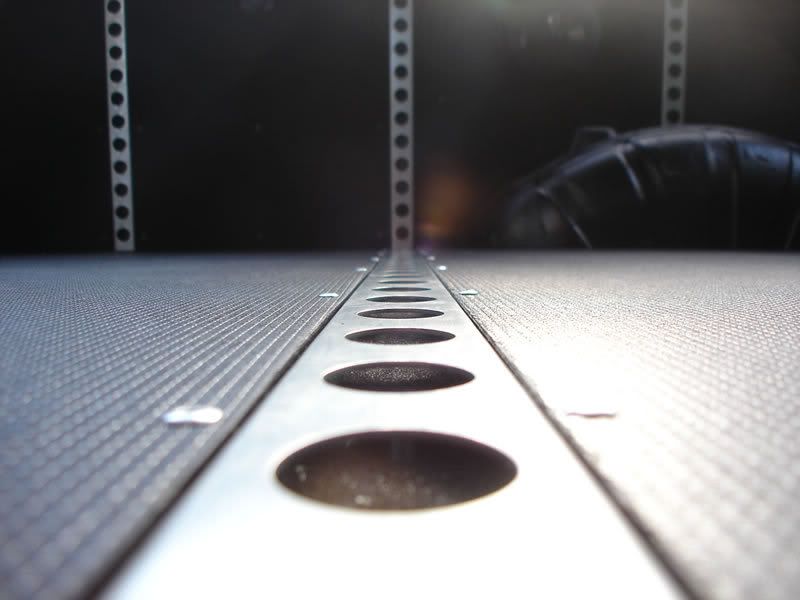
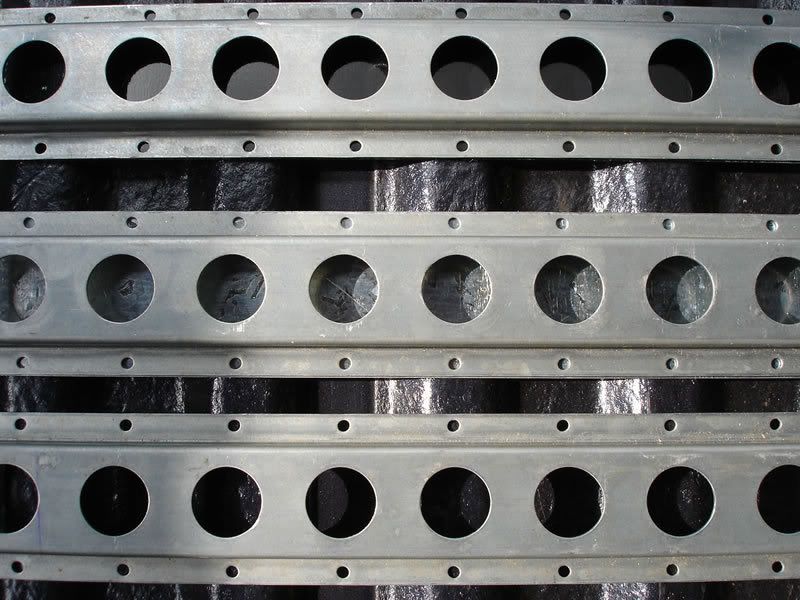
On the day I went searching high & low for tie-down points I came across this 'track' which I figured would be VERY handy for my needs. 3 x 10ft lengths later, I headed home and cut strips of thin galvanised sheet to sit behind/under the track. This would stop small objects from dropping through the track and rolling up & down the ribs in the floorpan. Things could still drop into the track - but they could go no further and I could then pick them out easily. The bottom track shows (just) the ribs in the floor through the holes. The middle track shows the galv. plate underneath and the top track shows the galv. plate coated in black vinly to make things easier to spot in the track.
Image

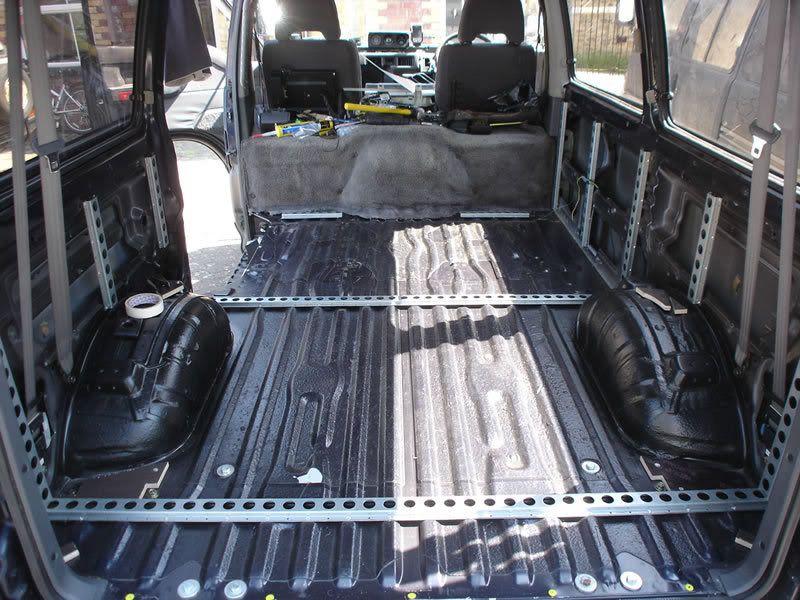
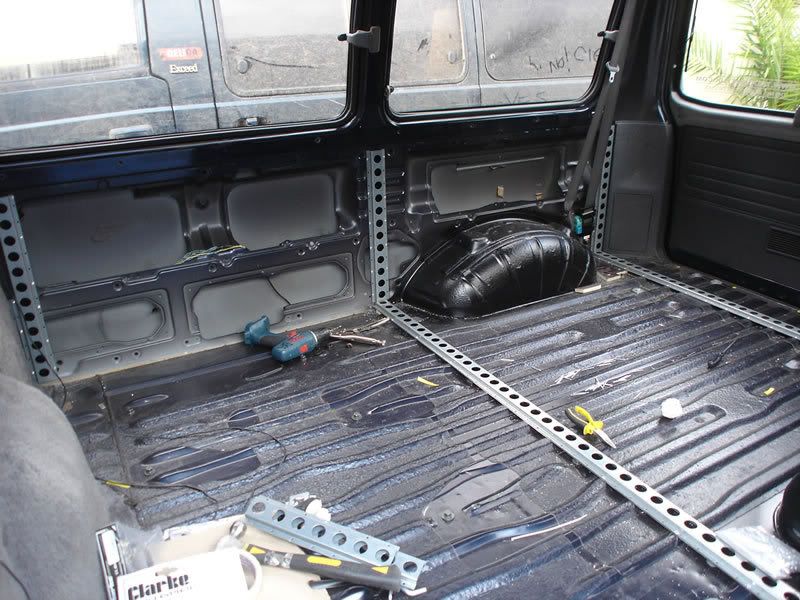
Next was to start to measure, cut, trim and fit the track into the back of the motor. It took many hours of measuring to ensure that the track sat in the right places, that I could get rivets in the best (strongest) places, that the sides would line up with the floor sections and that everything was evenly spaced and 'square' to the rest of the car! Each piece of track was riveted to the body/floor and double checked that the rivets were correctly secured.
Image

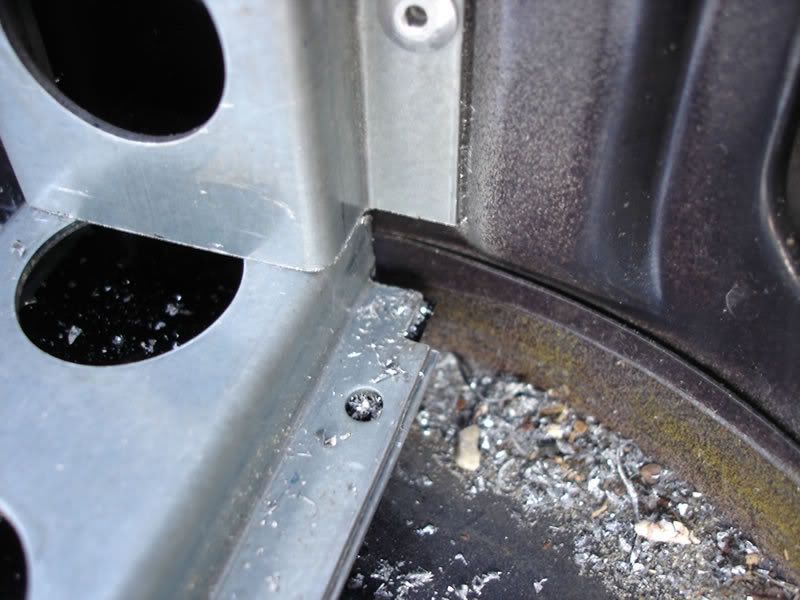
Lots of cutting/shaping was needed to get the track to fit correctly around trim and other parts of the interior like the rear seatbelts
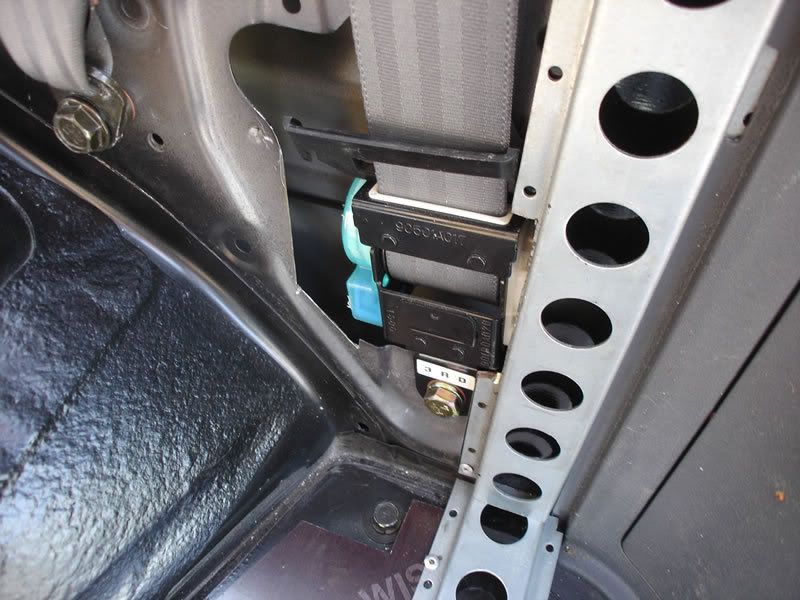
Image
Image

Other parts needed reinforcing to ensure that the end of the track was secured and not ‘floating’ in mid air
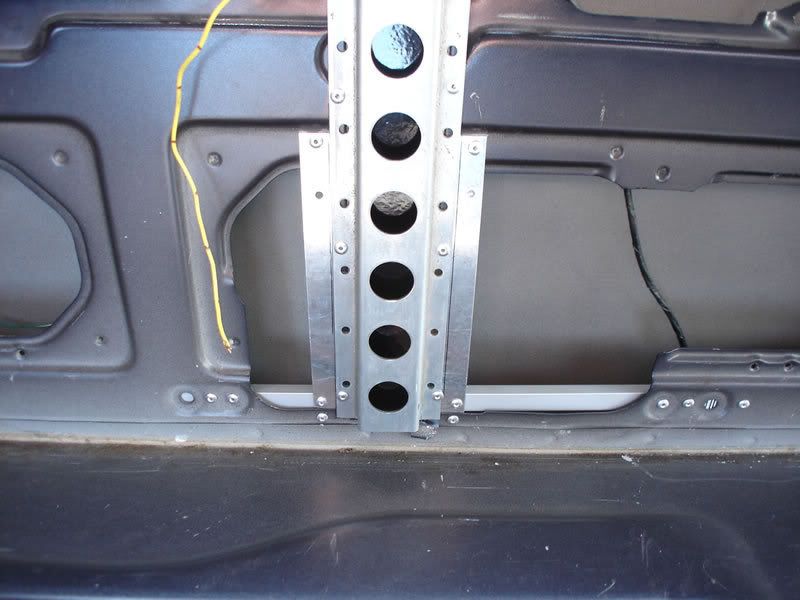
Image

Now that some of the main elements of the track are installed I can start measuring/templating/cutting the floor panels to fit in between the tracks. I had chosen a special ‘Phenolic’ plywood with a resin coated textured surface and water resistant adhesives to bond the layers together. More tricky to cut/shape but the end result should look neat and most importantly be VERY hard wearing & durable!

My aim was to get the panels to fit as neatly as possible (+/-0.5mm tolerance ideally) and decided to try and achieve this with just a jigsaw rather than using a circular saw!! I won’t explain my reasons here, but suffice to say that after a LOT of careful measuring (measure 10 times, cut once) I managed to achieve an almost perfect fit (within my tolerance) and no chips in the phenolic surface. One VERY pleased person was the result! You can see my templates in the foreground and my amazing al fresco workshop in the background! Who needs fancy machinery??
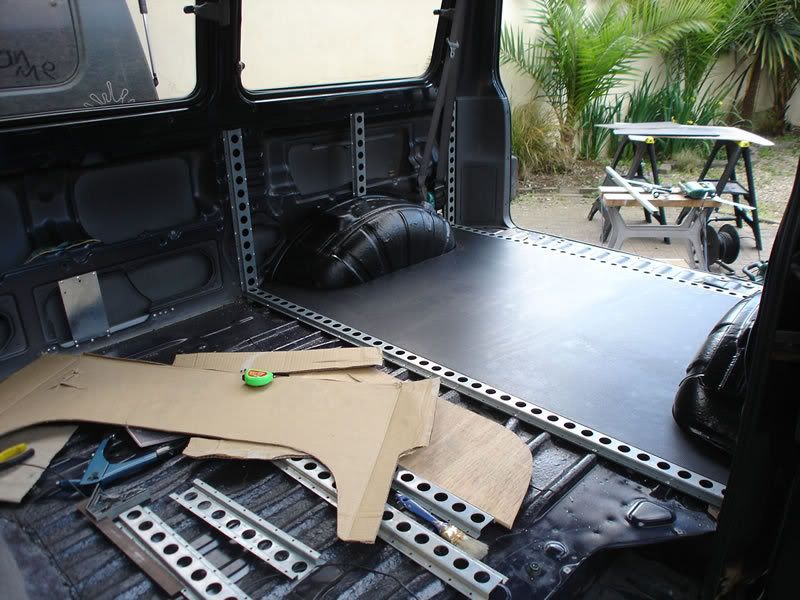
Image

Once all the floor panels were test fitted and just how I wanted them, I finished fitting the rest of the side tracks while the ‘raw’ cut edges of the ply were painted black to make them look neater (purely for aesthetics seeing as this ply is waterproof anyway! Maybe I was being a little pedantic about the finish!!! Lol)

Here is the motor with all the track fitted ready for the floor to go in:
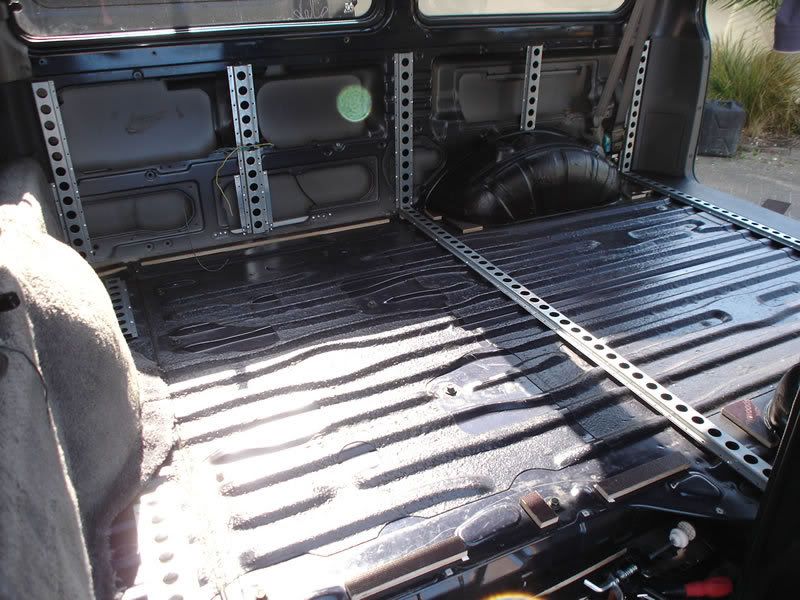
Image
Image

Next up was a layer of foam insulating material to act as a sound deadener and also to make the rear a little warmer when camping in the back.
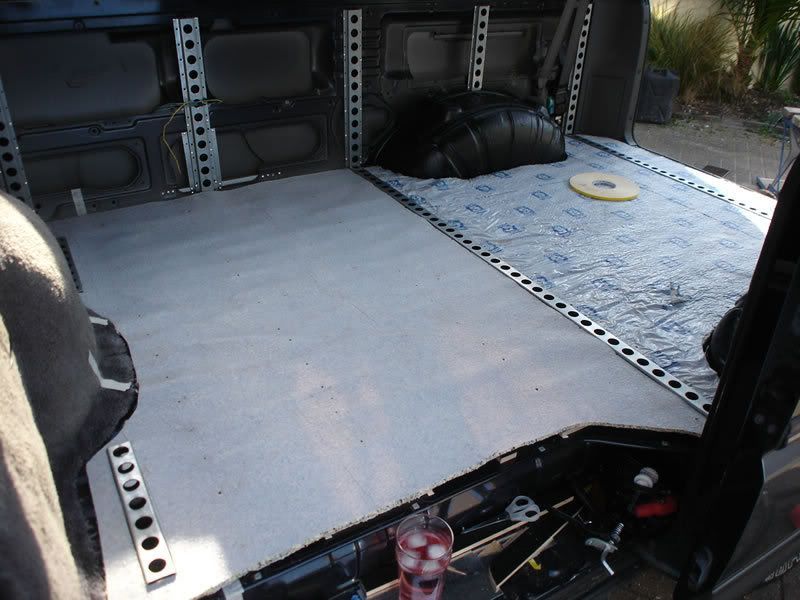
Image

At this point I then spent a whole day bonding (re-bonding) the inner and outer panel skins together on the sides of the bodywork to stop them drumming/vibrating and making a horrible noise. I also made sure that the floor was fully sealed and any small holes filled with silicone so that once the floor was riveted down, there would be no need to pull it back up again.

The floor was then fitted and fixed into place. No photos because I forgot to charge my camera batteries!

Next step was to make all the side panels to fit in between all the vertical tracks. These where carefully measured and cut in 6mm ply with all the correct holes for seatbelt mounts, accessory sockets, speakers etc…cut into them before being fitted.
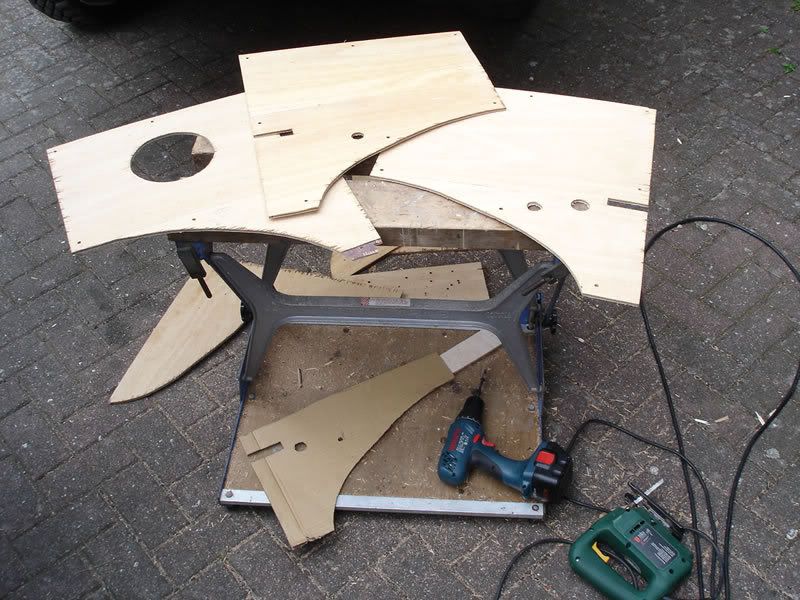
Image

Then I glued/bonded black carpet over the face of each panel (six in total, three shown) and trimmed with a border of a few inches
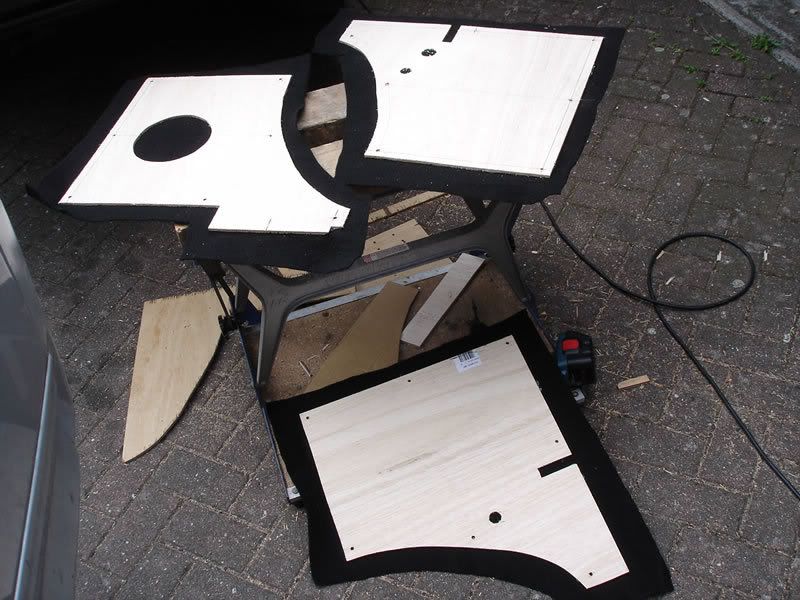
Image

I then cut/stretched and glued the border onto the back face of the panels. This made a neat job of the edges but also meant that the panels wouldn’t vibrate against the bodywork because the fabric would sit against the bodywork, not the wood.
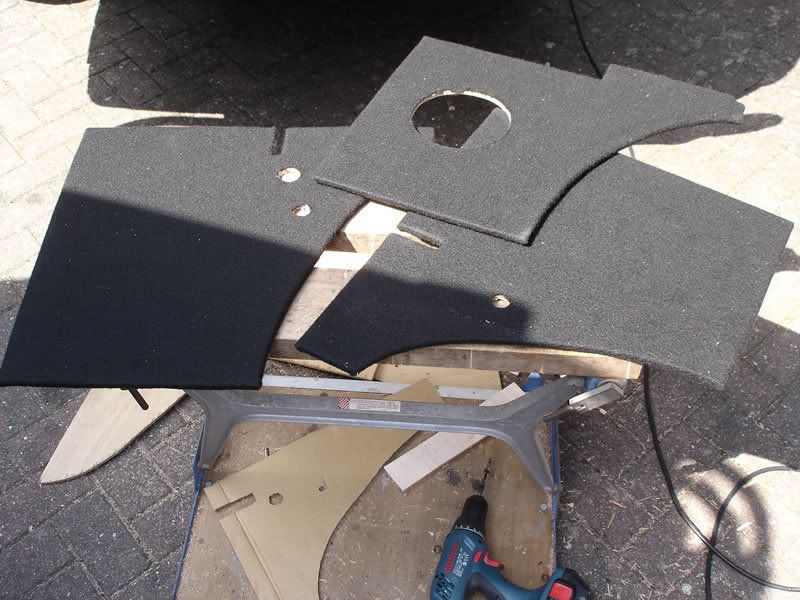
Image

So there you go – a lot of work just to panel the back of the van out…..and I’ll upload some pics of the finished interior in a little bit…….let’s just say that I am VERY pleased with the results!!
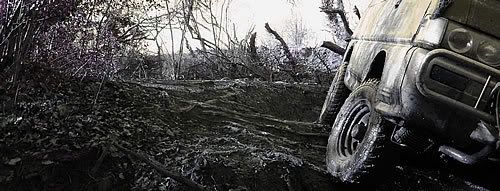
L300 Mystery Machine (High Altitude Edition 8-) )
L300 MudMonkey ($400 bargain banger!! :!: )


Image
User avatar
patty
Posts: 713
Joined: Sat Jun 16, 2007 1:45 pm
Member's Photo Album: http://www.delica.ca/Photos/
Vehicle: delica chamonix
Location: Whistler/Prince George

Re: Say hello to the new Mud Monkey (this one is for keeps!)

Post by patty »

Im lovin that, when i get some time and cash i want to diamond plat the rear floor and side walls, plus the side panels on the front doors n slider.
Mystery Machine
Posts: 510
Joined: Fri Dec 08, 2006 12:06 pm
Location: Bristol (UK)

Re: Say hello to the new Mud Monkey (this one is for keeps!)

Post by Mystery Machine »

patty wrote:Im lovin that, when i get some time and cash i want to diamond plat the rear floor and side walls, plus the side panels on the front doors n slider.
Be careful with diamond plate, it drums a lot - especially if used as side panels. You'll need to use some form of insulation on any surface that touches the bodywork otherwise you'll be regretting it! Also - the edges are a nightmare to finish nicely because of all the raised diamond bits. Lots of sharp edges, even when rubbed down and you'll forever be snagging things on it!

I wanted to go with something that was more 'user friendly' and less cold/industrial to look at. I've got nothing against diamond plate, but reckon a complete interior of it may be a bit too much and not as welcoming as the route I took in the end.

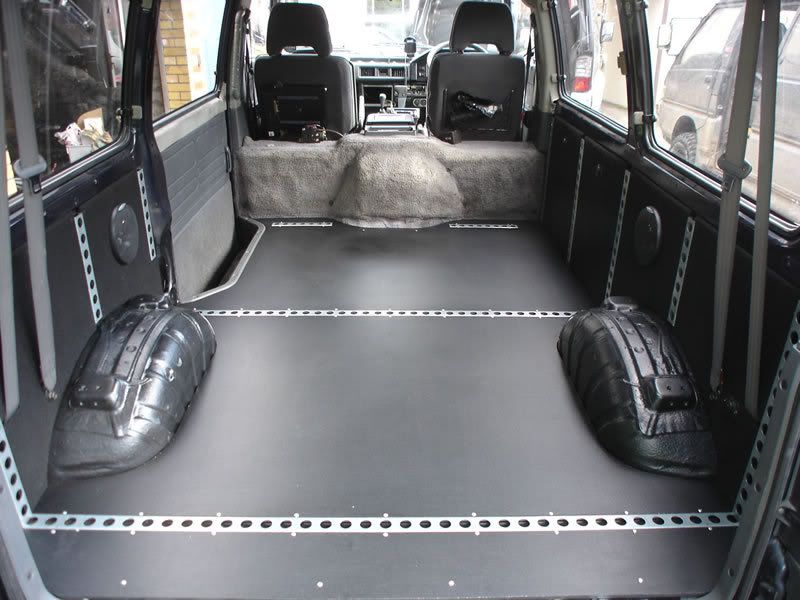
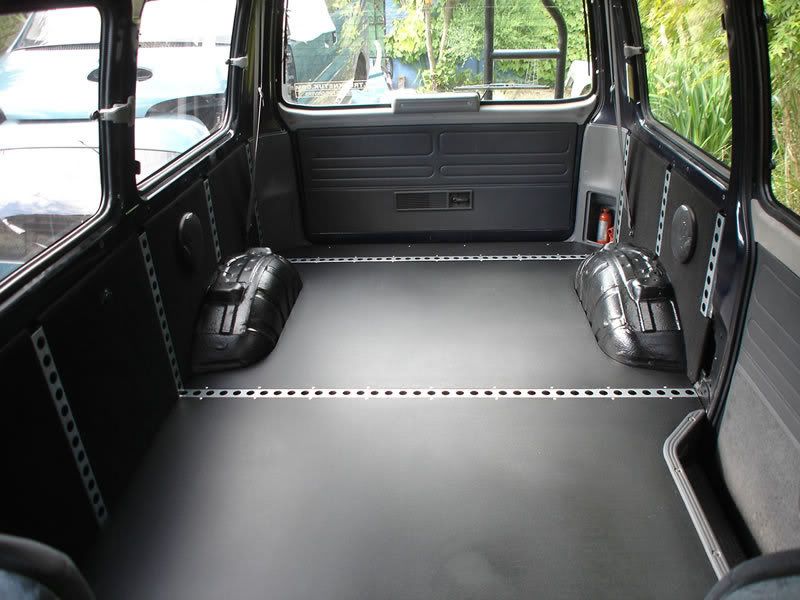
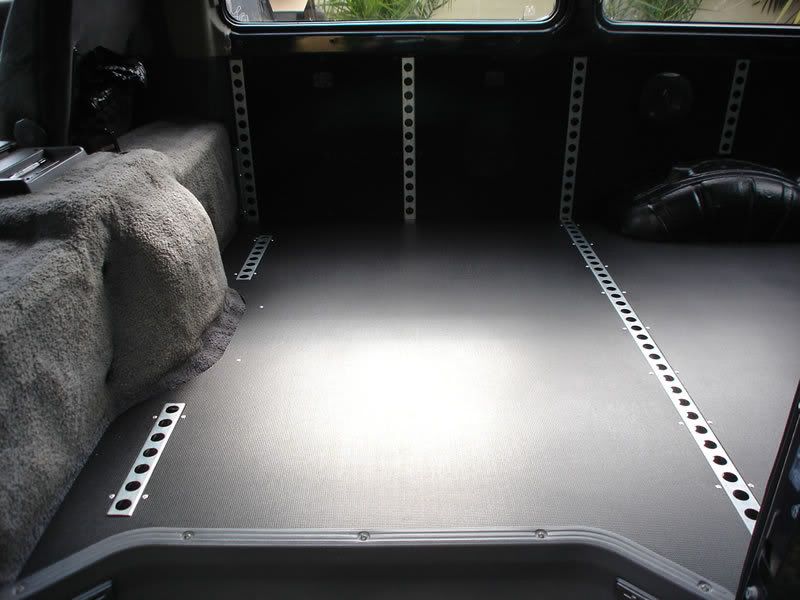
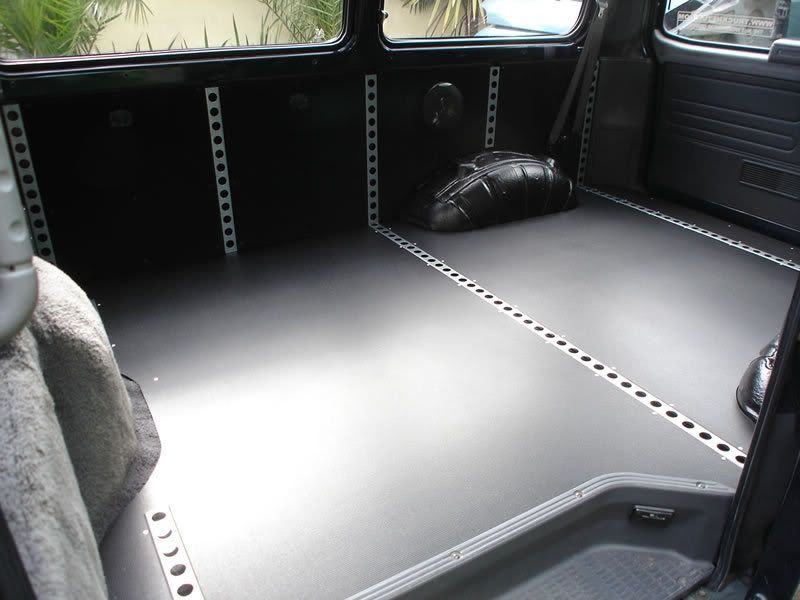
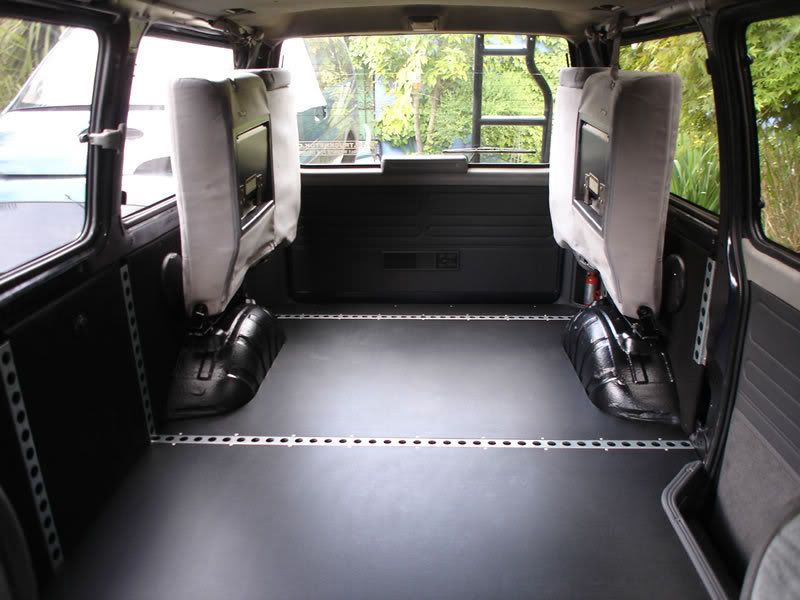
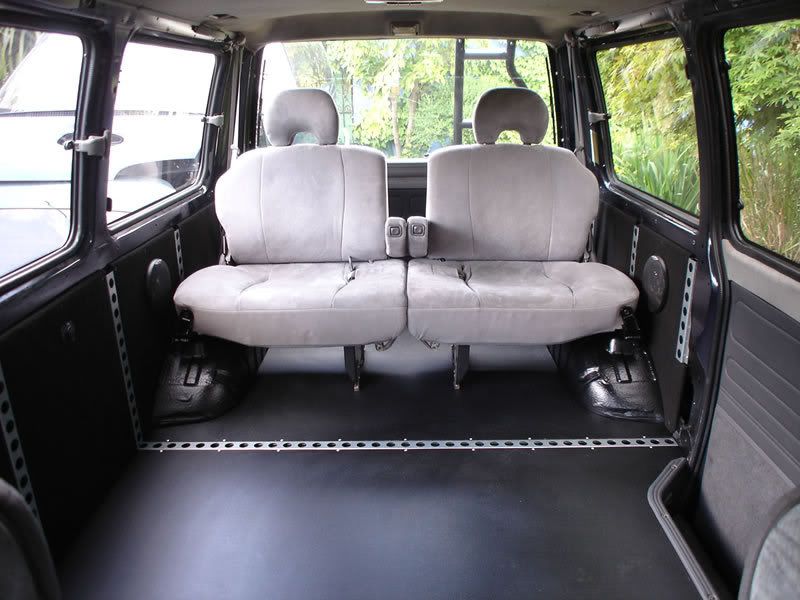
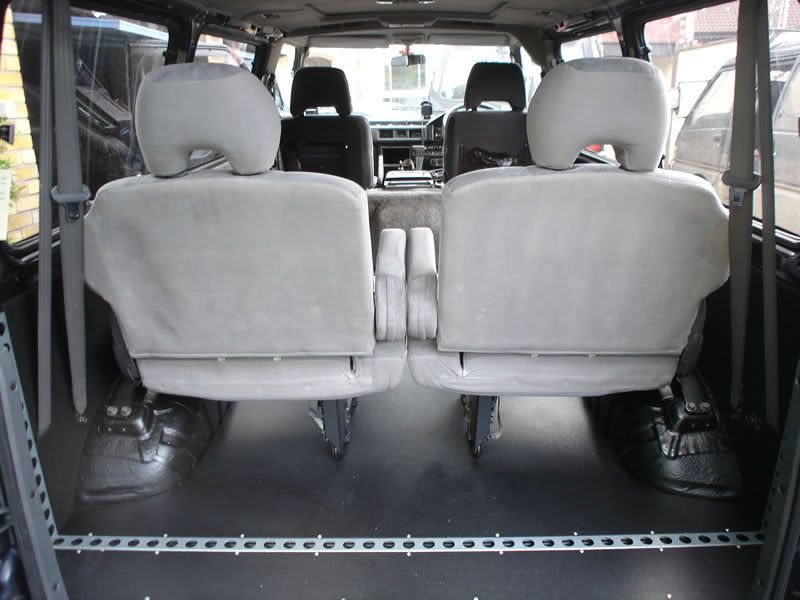
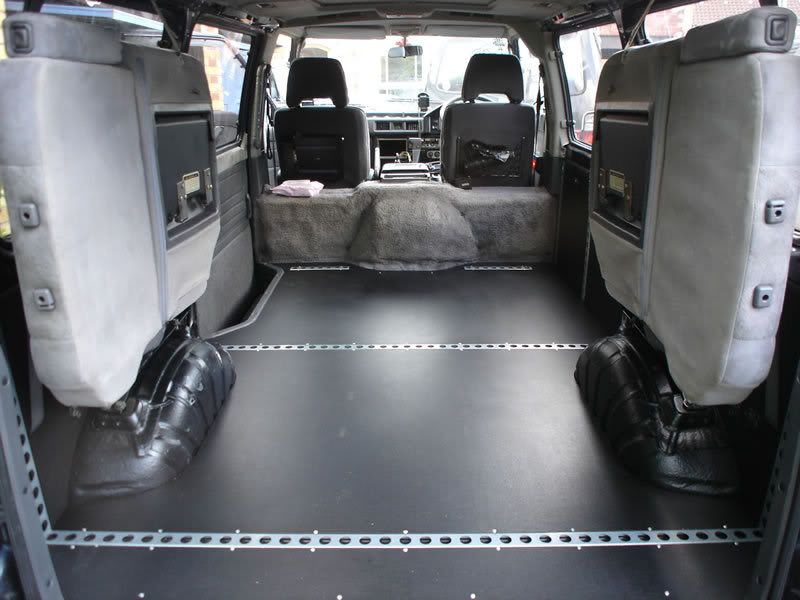
Anyway, here are the photos of the interior installed and fixed in place:

(I'll be doing something with the sliding door panel to make it match the rest of the interior)

Image

Image

Image

Image

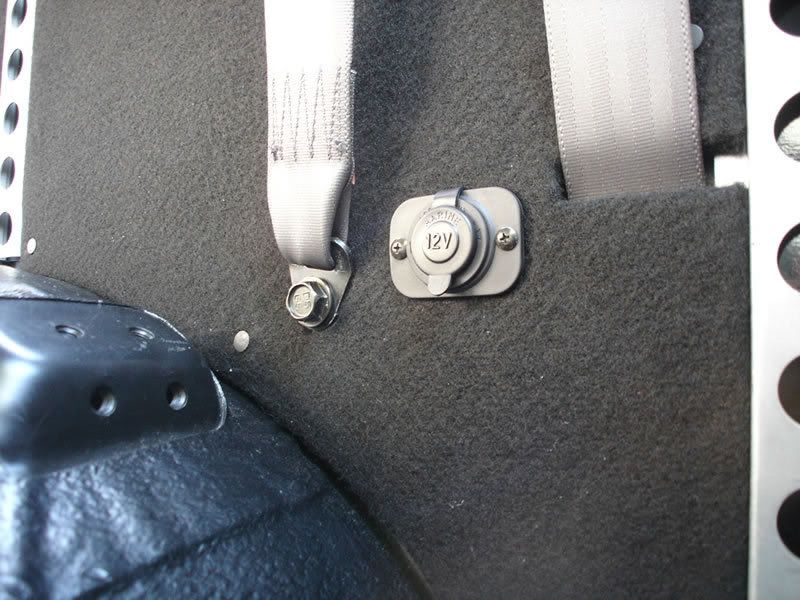
Getting the belts to fit was quite a lot of careful measuring to make sure the moutning points lined up with the panels......and I threw in a 12V accessory socket too (this one is permanent 12V)

Image

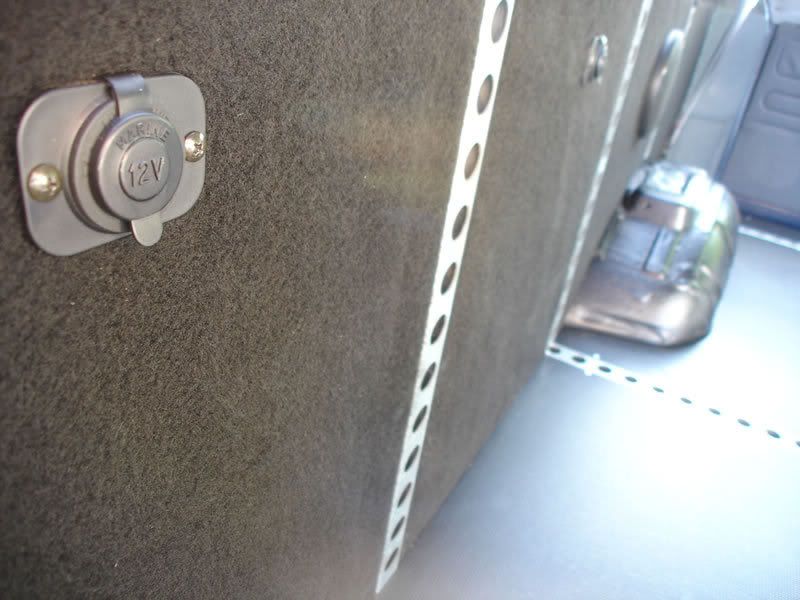
In the two panels behind the drivers seat I also fitted some 12V sockets but these ones run off the accessory circuit. All wiring (including any extension lengths I needed to add) utilise the genuine wiring in all the correct colours, all wound into the original loom, connected through original plugs/sockets onto the main loom and all joints are soldered/covered in heatshrink. Reliability and continuity was paramount. One of the reasons this install took so long, but I wanted it to be 'right' even when it can't be seen....

Image

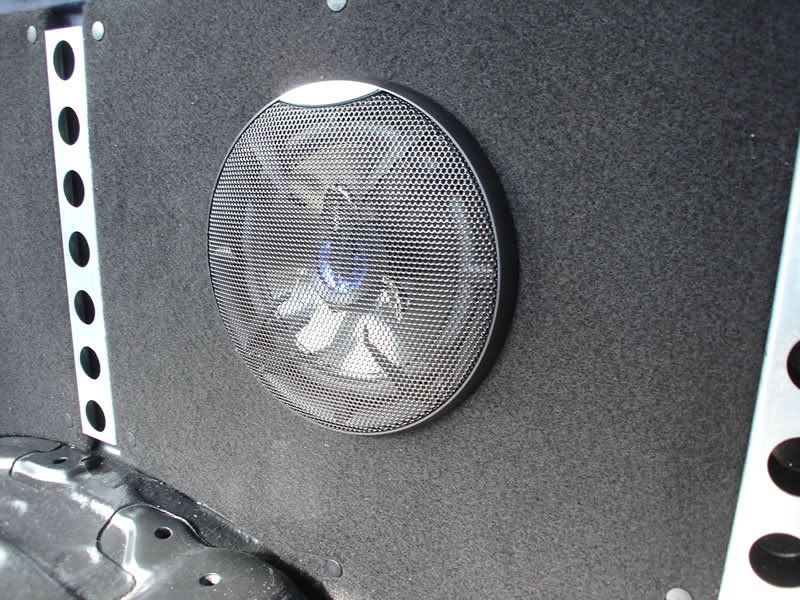
Some Clarion 6.5" speakers put in to add some good sound. Even though it's a work van, I spend a LOT of time behind the wheel, so I like to have some tunes....

Image

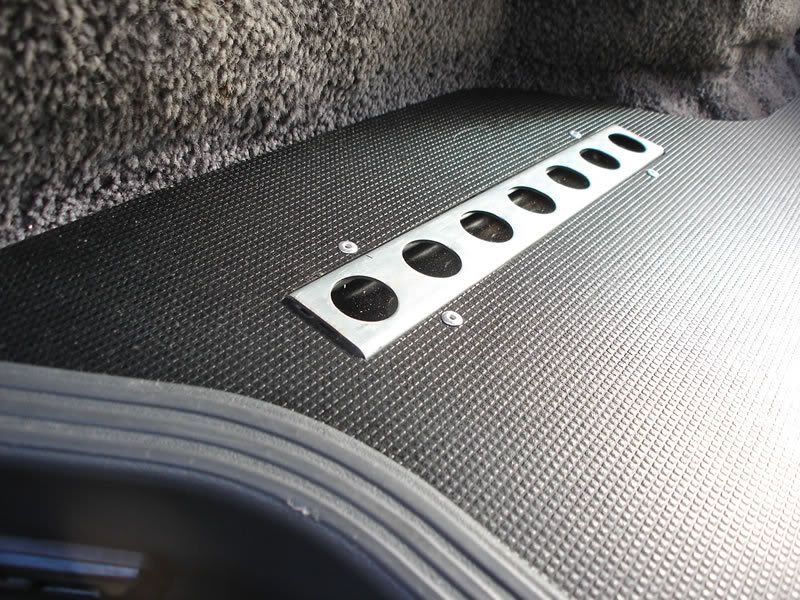
Getting the floor to fit accurately over the tie-down track was pretty tricky but I am pleased with the result (even if I was cursing at the time!)

Image

I wanted a +/- 0.5mm tolerance for the fit and think I acheived it pretty well - even using a hand held jigsaw for the cutting.

Image

Overall I wanted the interior to look as professional as possible and not like some wood that was 'thrown in' for protection. I reckon i acheived it. All I need to do now is make a 'capping' strip to run from front to back over the top of the side panels (just under the windows) to neaten it up.

VERY pleased....and now to get it filled with tools and put it to work..... :D :D
L300 Mystery Machine (High Altitude Edition 8-) )
L300 MudMonkey ($400 bargain banger!! :!: )


Image
User avatar
BCDelica
Posts: 1808
Joined: Tue Jul 18, 2006 4:12 pm
Member's Photo Album: http://www.delica.ca/Photos/index.php?cat=10008
Vehicle: WVO Powered Tuk Tuk
Location: Central Van Isle
Location: Somewhere with plenty of sun

Re: Say hello to the new Mud Monkey (this one is for keeps!)

Post by BCDelica »

Mystery Machine wrote: My aim was to get the panels to fit as neatly as possible (+/-0.5mm tolerance ideally) and decided to try and achieve this with just a jigsaw rather than using a circular saw!!
That's one steady hand you have there Bruce, impressive job! Is there no caffeine in English tea?
Answers that common Delica question of how to secure something when you don't have seats to wedge it in with.

Cheers,
Kev
Image Call me BCDelica-less
User avatar
mararmeisto
Posts: 3276
Joined: Wed Sep 19, 2007 10:00 am
Vehicle: 2018 Ram EcoDiesel
Location: Dartmouth, NS

Re: Say hello to the new Mud Monkey (this one is for keeps!)

Post by mararmeisto »

Wow, Bruce. That is a very well done job. When can you come by my house?
JPL
I still miss my '94 Pajero!
User avatar
jwfchase
Posts: 508
Joined: Mon Dec 03, 2007 10:36 pm
Member's Photo Album: http://www.delica.ca/Photos/
Vehicle: '92 Super Exceed
Location: Kamloops, BC

Re: Say hello to the new Mud Monkey (this one is for keeps!)

Post by jwfchase »

mararmeisto wrote:Wow, Bruce. That is a very well done job. When can you come by my house?
I'd say someone who puts as more emphasis on what's UNDER the finish than the finish itself (yet is also a perfectionist about the finishing as well) is definately the person I would want building my house! (Oh yeah, and my Delica...)
Green1
Posts: 3257
Joined: Wed Jul 19, 2006 9:18 pm
Member's Photo Album: http://www.delica.ca/Photos/
Vehicle: 1994 L400 Royal Exceed PF8W
Location: Calgary Alberta Canada
Contact:

Re: Say hello to the new Mud Monkey (this one is for keeps!)

Post by Green1 »

Very nice!

one comment though... the speakers stick out when I would have thought they should be recessed to avoid damage...
User avatar
MadB0mb3r
Posts: 58
Joined: Thu Dec 06, 2007 4:50 pm
Vehicle: 92 Delica Chamonix
Location: Squamish

Re: Say hello to the new Mud Monkey (this one is for keeps!)

Post by MadB0mb3r »

Top notch...

looks slick for a work van..

Cheers..
Colin. W

A common mistake that people make when trying to design something completely foolproof is to underestimate the ingenuity of complete fools..
User avatar
stubblebut
Posts: 48
Joined: Sat May 03, 2008 10:59 pm
Member's Photo Album: http://www.delica.ca/Photos/
Vehicle: 1991 Delica Super Exceed
Location: Victoria, BC

Re: Say hello to the new Mud Monkey (this one is for keeps!)

Post by stubblebut »

Ur a mad man with mad skills. Sweet rig! Can't wait to see photos of MM's ass end scraped up and full of gear. Cheers!
Image
delica 304
Posts: 322
Joined: Sun Dec 23, 2007 7:19 am
Member's Photo Album: http://www.delica.ca/Photos/
Vehicle: 1992 delica GLX
Location: Lower left hand of Canada, surrounded by a moat!

Re: Say hello to the new Mud Monkey (this one is for keeps!)

Post by delica 304 »

Uuuuuh, ummumummm uhhhhh...

(shiny overload)
Mystery Machine
Posts: 510
Joined: Fri Dec 08, 2006 12:06 pm
Location: Bristol (UK)

Re: Say hello to the new Mud Monkey (this one is for keeps!)

Post by Mystery Machine »

Green1 wrote:one comment though... the speakers stick out when I would have thought they should be recessed to avoid damage...
Of all the people on this forum Roger, I thought you would know me well enough to realise that there would be a reason/decision/plan behind every part of the design :wink:

You know there is NO WAY I would leave a speaker as exposed and vulnerable as that in a work van unless it was going to be 'protected' by something not yet installed.... :mrgreen:

.....and I can't believe no one asked why I was fitting rear seat belt in when I want it to be a work van?? (BC Delica/Green1 have seen this mod before on the Mk1 Mud Monkey, hence my comment above)

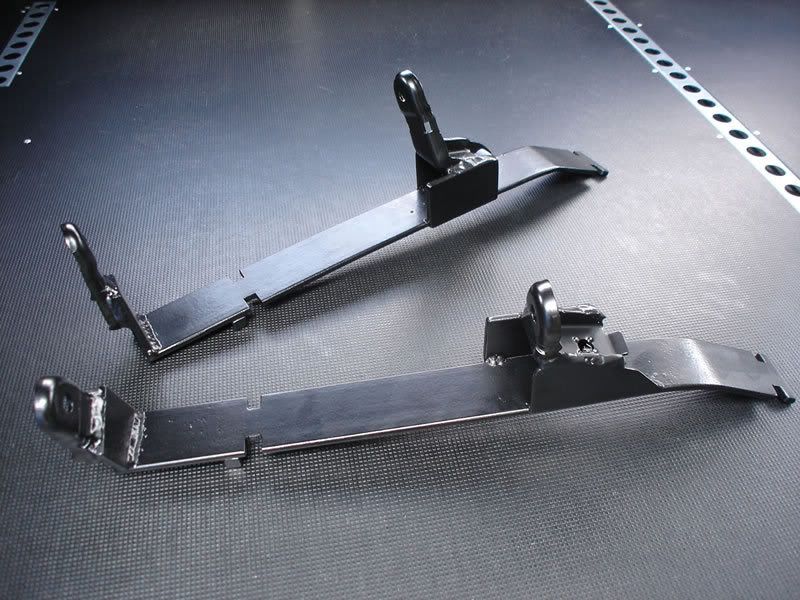
Here is my speaker protection system which also happens to double up as some 'spare' seats:

Custom subframe brackets made from some spare strips of 5mm steel (and sprayed satin black)

Image

Bolt these subframes to some L400 rear seats and install - approx 2 mins for each seat to install.....

Image
Image


Image
Image

Now I have a protected set of speakers AND a work van AND some people carrying capacity.

Life is sweet..... 8-) 8-)
L300 Mystery Machine (High Altitude Edition 8-) )
L300 MudMonkey ($400 bargain banger!! :!: )


Image
Green1
Posts: 3257
Joined: Wed Jul 19, 2006 9:18 pm
Member's Photo Album: http://www.delica.ca/Photos/
Vehicle: 1994 L400 Royal Exceed PF8W
Location: Calgary Alberta Canada
Contact:

Re: Say hello to the new Mud Monkey (this one is for keeps!)

Post by Green1 »

*sigh* we need L400 seats out here... (I could pass on the vehicle... all I want are the seats ;-) )

BTW... weren't you going to find a solution to allow those seats to clip in to the floor when down? I seem to remember you mentioning it on the original Mud Monkey...
Mystery Machine
Posts: 510
Joined: Fri Dec 08, 2006 12:06 pm
Location: Bristol (UK)

Re: Say hello to the new Mud Monkey (this one is for keeps!)

Post by Mystery Machine »

Green1 wrote:*sigh* we need L400 seats out here... (I could pass on the vehicle... all I want are the seats ;-) )
Do you want me to work out a price for shipping?? (including some MM custom subframes) I could pick up rear seats pretty cheap over here and even when L400's do arrive on your shores, I doubt they'll be parting out many for quite some time!! I reckon the shipping price will make your eyes bleed though - even if I can source the seats for peanuts! :shock:

My seats were free, the subframes cost me all of £5.00 ($10.00) and that makes me a happy guy! Sorry to rub it in!!
L300 Mystery Machine (High Altitude Edition 8-) )
L300 MudMonkey ($400 bargain banger!! :!: )


Image
Green1
Posts: 3257
Joined: Wed Jul 19, 2006 9:18 pm
Member's Photo Album: http://www.delica.ca/Photos/
Vehicle: 1994 L400 Royal Exceed PF8W
Location: Calgary Alberta Canada
Contact:

Re: Say hello to the new Mud Monkey (this one is for keeps!)

Post by Green1 »

shipping items that large is painfully expensive, I think I'll have to pass for a few years yet...
User avatar
patty
Posts: 713
Joined: Sat Jun 16, 2007 1:45 pm
Member's Photo Album: http://www.delica.ca/Photos/
Vehicle: delica chamonix
Location: Whistler/Prince George

Re: Say hello to the new Mud Monkey (this one is for keeps!)

Post by patty »

Alright it looks pretty f@*$ing good. Now if you really wonna turn some heads try find away to make that back seat a pull out couch (bed).

oooooo my deli is on the little picture thing in the top of the screen, so happy
Post Reply

Return to “Member Rides”