NORDO's Camperization Project

Mitsubishi Delica Camper vans, lift kits & other Delica Accessories!

Moderator: BCDelica

User avatar
Nordo
Posts: 80
Joined: Wed Sep 22, 2010 11:50 am
Member's Photo Album: http://www.delica.ca/Photos/
Vehicle: 93 Exceed
Location: Lethbridge AB

NORDO's Camperization Project

Post by Nordo »

Well I have finally started to do the interior of my van. I have spent hours going through member photos and looking at pics of campers and also figuring out what I really want/need my van to do for me. and I have come up with a design!!! So here are some pics and some descriptions of what I have done. I hope you enjoy!!


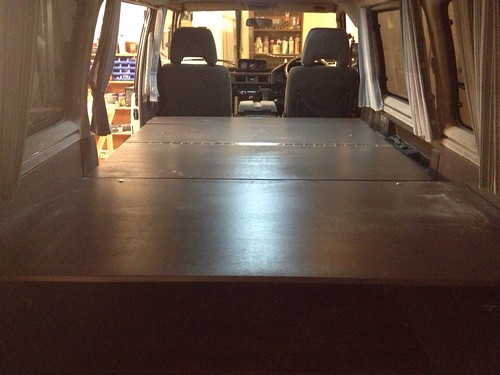
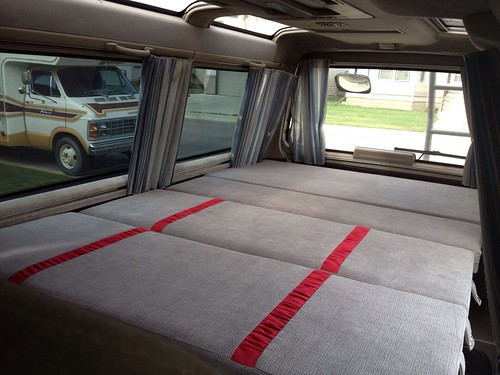
First off I decided that the carpet had to go, and even though I love the captain chairs so much, they are not in the cards for my van. So here is one last look at the interior before it all goes (minus one chair, not very good at taking pictures before I start working)....

Image

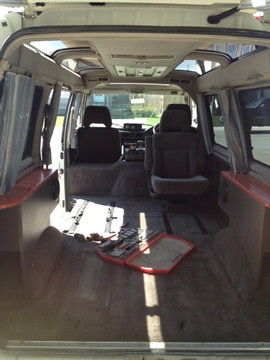
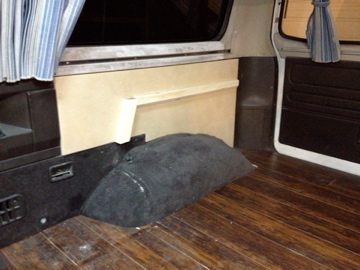
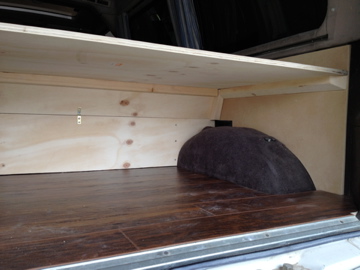
Now Its time to 'Gut' the van!! The side boards were something I made when I first got the van after I removed the bench seat, but now with the new plan they are no longer relevant, so they are going as well.

Image

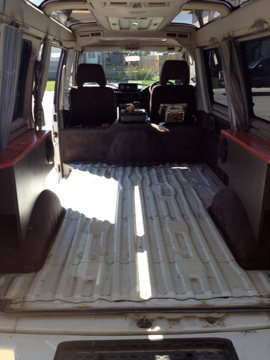
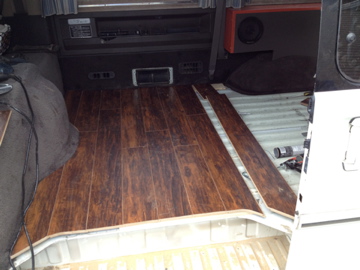
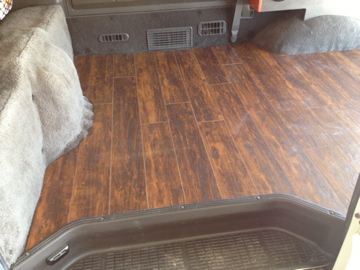
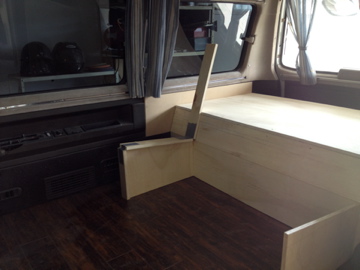
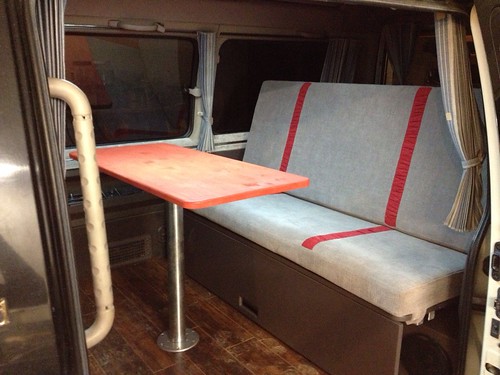
After taking the van camping a few times I decided the best thing for the flooring is something hard and very much less carpety than what I had, then I walked through Home Depot and saw a smoking deal on some flooring. Total cost = 35 bucks!!! and I think it looks great!!

Image

Image

Image
Last edited by Nordo on Wed Jul 17, 2013 12:52 pm, edited 1 time in total.
I only break stuff so i can put bigger stuff on.....
Image
User avatar
Nordo
Posts: 80
Joined: Wed Sep 22, 2010 11:50 am
Member's Photo Album: http://www.delica.ca/Photos/
Vehicle: 93 Exceed
Location: Lethbridge AB

Re: Its time to Pimp my Ride!!

Post by Nordo »

The next step is to build the bed top and speaker boxes. I plan on creating a bench that folds down into a bed that also has a lot of storage in the back as well as a bit up front. It also needed to be light, so I used spruce plywood as well as aluminum support beams for some extra strength.

The starting pieces to support the top of the bed as well as the front of the bench.

Image

Starting to take shape!! Although it isnt installed yet, I will be running a support beam across the back of the bed to add more support for the 1/2 inch plywood. But I figure once that is done it should support up to 700 lbs.

Image

You can see the plan (sort of) from this shot. If you look at the left top sitting on the gable, there is a piece of plywood jined by duct tape. This is my mock up of the bench. The duct tape is simulating hinges. It will sit on the gable until its time to fold it into a bed.

Image

Speaker Boxes added!!

Image

Hmmmmm.... what could the holes be for??

Image

oh, right!! the bed supports

Image

ok thats it for now. More to come!!!
I only break stuff so i can put bigger stuff on.....
Image
User avatar
macro
Posts: 646
Joined: Fri Sep 23, 2011 4:37 pm
Member's Photo Album: http://www.delica.ca/Photos/
Vehicle: L400 "The Invader"
Location: Toronto, ON

Re: NORDO's Camperization Project

Post by macro »

Looks awesome! How do you stop the seat frame and hardwood from rattling around when you're driving?
User avatar
Super Exceeded
Posts: 620
Joined: Mon Aug 16, 2010 11:09 am
Member's Photo Album: http://www.delica.ca/Photos/
Vehicle: 1993 L300S
Location: South Surrey

Re: NORDO's Camperization Project

Post by Super Exceeded »

Looking good!
Rattlenbang
Posts: 647
Joined: Sun Dec 16, 2012 8:29 pm
Member's Photo Album: http://www.delica.ca/Photos/
Vehicle: delica
Location: Victoria

Re: NORDO's Camperization Project

Post by Rattlenbang »

Nice!
My new novel A Dark and Promised Land has just been released by Dundurn Press. "On the eve of war he is compelled to reclaim her love, setting himself against his people amid a conflict that will form a nation." http://www.darkpromisedland.com/
User avatar
Nordo
Posts: 80
Joined: Wed Sep 22, 2010 11:50 am
Member's Photo Album: http://www.delica.ca/Photos/
Vehicle: 93 Exceed
Location: Lethbridge AB

Re: NORDO's Camperization Project

Post by Nordo »

macro wrote:Looks awesome! How do you stop the seat frame and hardwood from rattling around when you're driving?
Well the hardwood floor doesn't move or make noise at all!! It is engineered flooring so it has a layer of foam on the bottom of each board, so no rattle at all. I also used PL400 on every other row to keep the floor secure. As for the cabinet, so far everything is well attached and there is no vibration of any kind. Once i have the bench installed (pics to come) It will have attach points for it to be secured in while in the 'seating position'. I had to figure out something because I really don't want anything to come flying forward in the unlikely even i hit a tree, or worse. I have a guy making custom cushions for me as well, so I imagine that will dampen any sound from the cabinet that may come from vibration.
I only break stuff so i can put bigger stuff on.....
Image
User avatar
almac
Posts: 717
Joined: Mon Jul 06, 2009 1:29 am
Member's Photo Album: http://www.delica.ca/Photos/
Vehicle: '91 Delica "Tessen"
Location: Okanagan
Location: Okanagan, BC CANADA

Re: NORDO's Camperization Project

Post by almac »

nicely done!
I have been thinking of redesigning my camper myself. I think I might turn my bench seat sideways, and bolt it down for the occasional passenger.
your flooring looks great! how many square feet did you need to do it all?
Roads!? Who the hell needs roads!?,
al
Image
91' Delica "Tessen", 5spd, RS9000XLs, camperized.
User avatar
Nordo
Posts: 80
Joined: Wed Sep 22, 2010 11:50 am
Member's Photo Album: http://www.delica.ca/Photos/
Vehicle: 93 Exceed
Location: Lethbridge AB

Re: NORDO's Camperization Project

Post by Nordo »

almac wrote: I think I might turn my bench seat sideways, and bolt it down for the occasional passenger.
your flooring looks great! how many square feet did you need to do it all?

I figured 45 ft. Probanly ended up as about 40. I bought 3 packs of wood that covered 17 ft each and I used 2 for sure and 2 planks from the last bundle. Its a good rule of thumb to add about 10% to your figure for cuts and mistakes, but if you feel you are on your 'A' game 45 feet should be enough!!
I only break stuff so i can put bigger stuff on.....
Image
User avatar
Nordo
Posts: 80
Joined: Wed Sep 22, 2010 11:50 am
Member's Photo Album: http://www.delica.ca/Photos/
Vehicle: 93 Exceed
Location: Lethbridge AB

Re: NORDO's Camperization Project

Post by Nordo »

Ok well its been done for a while, but I havent had much time to post the pictures, so here you go...

here is the bench installed...
Image

All the hardware stores under the seat to keep out of the way. It also adds the support for the span of the seat when the bench is upright...
Image

Here is a view of the framework when the bed is made.
Image

Here is the bed platform all set up.
Image

And here is my deli with all the cushions installed in both configurations. It takes about 5 min to set up and/or take down but I love it so far and it is very comfortable!!

Image

Image

Image

Image

Now its time to re-do the curtains!!!
I only break stuff so i can put bigger stuff on.....
Image
User avatar
glenn
Posts: 661
Joined: Tue Jan 08, 2008 10:18 pm
Vehicle: 93 L300/97 L400 Jasper
Location: coquitlam
Location: coquitlam
Contact:

Re: NORDO's Camperization Project

Post by glenn »

Now its time to re-do the curtains!!!
That's funny, that is exactly what I thought when I re-did my van interior. Suddenly, they were hideous.

Nice job - laying in your bed, looking up through the CLR is awesome. Who did your upholstery work? It looks pretty nice.
Glenn
http://www.vurv.ca

L400 and L300 consoles
Image
User avatar
Nordo
Posts: 80
Joined: Wed Sep 22, 2010 11:50 am
Member's Photo Album: http://www.delica.ca/Photos/
Vehicle: 93 Exceed
Location: Lethbridge AB

Re: NORDO's Camperization Project

Post by Nordo »

glenn wrote: Who did your upholstery work? It looks pretty nice.
I got the upholstery done by a great company in town that does house furniture (most expensive part of the project). Im pleased with how it turned out, except for the two red stripes. Im not sure why they thought I wanted them pleated, but thats how they came. still debating if I should take them back to redo the stripes. What do you think??

Pleats, or no pleats?
I only break stuff so i can put bigger stuff on.....
Image
User avatar
konadog
Posts: 1815
Joined: Tue Feb 26, 2008 9:25 pm
Vehicle: 1992 GLX L-300
Location: Campbell River, BC

Re: NORDO's Camperization Project

Post by konadog »

Looks great! Nix to the pleats though - I like it better all the same material.
Image
Happy Day!
Rattlenbang
Posts: 647
Joined: Sun Dec 16, 2012 8:29 pm
Member's Photo Album: http://www.delica.ca/Photos/
Vehicle: delica
Location: Victoria

Re: NORDO's Camperization Project

Post by Rattlenbang »

That's a nice conversion!. I'd like to do something similar, but with a narrower bed to allow room for my westy cabinet. Giving me good ideas, thanks :-)
My new novel A Dark and Promised Land has just been released by Dundurn Press. "On the eve of war he is compelled to reclaim her love, setting himself against his people amid a conflict that will form a nation." http://www.darkpromisedland.com/
User avatar
Nordo
Posts: 80
Joined: Wed Sep 22, 2010 11:50 am
Member's Photo Album: http://www.delica.ca/Photos/
Vehicle: 93 Exceed
Location: Lethbridge AB

Re: NORDO's Camperization Project

Post by Nordo »

konadog wrote:Looks great! Nix to the pleats though - I like it better all the same material.
I should clarify, I did ask to get the stripes put in, but I didn't want them all bunched like they are. I have a re-occurring red theme happening with my Deli, so the stripes are good with it. I can always turn them over when I don't want red!!
I only break stuff so i can put bigger stuff on.....
Image
User avatar
konadog
Posts: 1815
Joined: Tue Feb 26, 2008 9:25 pm
Vehicle: 1992 GLX L-300
Location: Campbell River, BC

Re: NORDO's Camperization Project

Post by konadog »

Nordo wrote:
konadog wrote:Looks great! Nix to the pleats though - I like it better all the same material.
I should clarify, I did ask to get the stripes put in, but I didn't want them all bunched like they are. I have a re-occurring red theme happening with my Deli, so the stripes are good with it. I can always turn them over when I don't want red!!
I should clarify too - I don't mind the red accents, but think it would look better if the material was all the equally taut. The bunchy pleats look like a pain - harder to clean etc. Over all though you've done a top-shelf job.
Image
Happy Day!
Post Reply

Return to “Delica Modifications”