Having my Deli painted in a couple of weeks and I am saving some money
by prepping it and removing ladder, mirrors, wipers and front nudge bar.
What is the simplest way to disconnect fog lights and remove nudge bar?
Does the shroud of the nudge bar need to be removed?
And would you colour match the shroud to the van colour, since it fades anyways?
Color will be all silver.
Cheers,
Joe
Prepping for paint
-
joedelica
- Posts: 204
- Joined: Tue Jan 08, 2008 10:14 pm
- Member's Photo Album: http://www.delica.ca/Photos/
- Vehicle: 95 Exceed XR The Sapporo Can
- Location: VanCity
- Location: VanCity
-
Mystery Machine
- Posts: 510
- Joined: Fri Dec 08, 2006 12:06 pm
- Location: Bristol (UK)
Re: Prepping for paint
Front bar is dead easy to remove.
From underneath, reach up under the shroud and disconnect the fogs, then unbolt them from underneath and remove them.
Once the fog lights have been removed you can remove the top panel of the shroud simply by lifting/popping it off. Make sure you don't lose the 'half moon' trim where the upper panel meets the bull bar.
Look down inside the shroud and you'll see two bolts on each side that need to be removed (quite tucked away) - treat these with a good dose of penetrating oil and leave to soak for a while. This is a good excuse to go make yourself a nice cup of tea (or whatever you guys drink over there!)
Once you've drunk your beverage and while the penetrating oil is still doing its stuff, from underneath follow the lower main bars back to where they are bolted to the chassis leg. Remove these two bolts (1 x 14mm bolt each side)
Now return to the four bolts inside the shroud. Undo these using a 14mm socket and a long extension.
Now lift the bar off the vehicle but make sure you go careful that you don't damage any of the AC pipes with the right leg of the bar as you lift it out....
If you want to remove the shround itself, simply unbolt it from the bull bar - this is done more easily when it is off the vehicle. If the bolts look/feel siezed then treat them with a god dose of penetrating oil and leave for a while.
Painting the bar is straight forward, but I wouldn't really recommend painting the shroud - it's a funny plastic and you'll need to use special primers to get paint to adhere and even then you should use special plasticiser in the paint to allow it to flex.
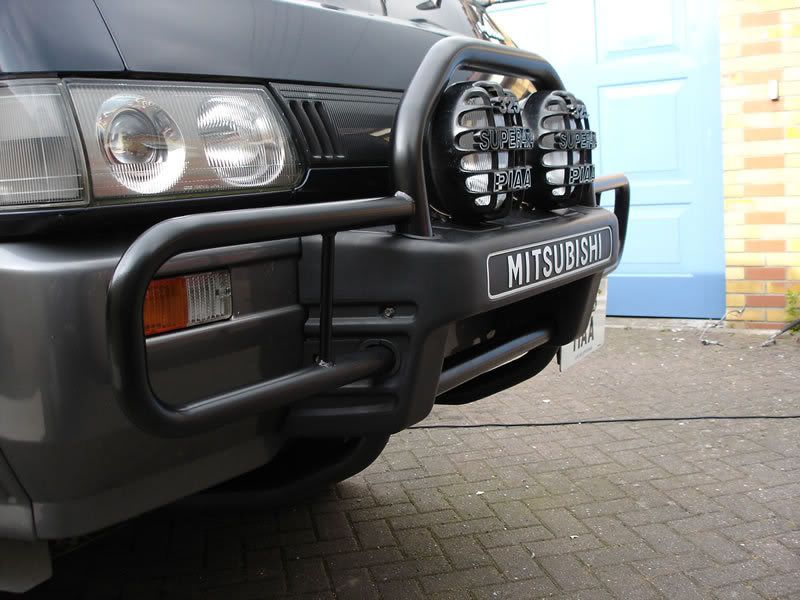
The best thing to do with these shrouds is to restore them back to their original colour by blasting them with a heat gun. With a bit of prcatice and some patience you can turn a light grrey very faded shround into something to be proud of!
Here is one I did a few weeks ago:

From underneath, reach up under the shroud and disconnect the fogs, then unbolt them from underneath and remove them.
Once the fog lights have been removed you can remove the top panel of the shroud simply by lifting/popping it off. Make sure you don't lose the 'half moon' trim where the upper panel meets the bull bar.
Look down inside the shroud and you'll see two bolts on each side that need to be removed (quite tucked away) - treat these with a good dose of penetrating oil and leave to soak for a while. This is a good excuse to go make yourself a nice cup of tea (or whatever you guys drink over there!)
Once you've drunk your beverage and while the penetrating oil is still doing its stuff, from underneath follow the lower main bars back to where they are bolted to the chassis leg. Remove these two bolts (1 x 14mm bolt each side)
Now return to the four bolts inside the shroud. Undo these using a 14mm socket and a long extension.
Now lift the bar off the vehicle but make sure you go careful that you don't damage any of the AC pipes with the right leg of the bar as you lift it out....
If you want to remove the shround itself, simply unbolt it from the bull bar - this is done more easily when it is off the vehicle. If the bolts look/feel siezed then treat them with a god dose of penetrating oil and leave for a while.
Painting the bar is straight forward, but I wouldn't really recommend painting the shroud - it's a funny plastic and you'll need to use special primers to get paint to adhere and even then you should use special plasticiser in the paint to allow it to flex.
The best thing to do with these shrouds is to restore them back to their original colour by blasting them with a heat gun. With a bit of prcatice and some patience you can turn a light grrey very faded shround into something to be proud of!
Here is one I did a few weeks ago:
L300 Mystery Machine (High Altitude Edition  )
)
L300 MudMonkey ($400 bargain banger!! )
)
L300 MudMonkey ($400 bargain banger!!
-
FalcoColumbarius
- Site Admin
- Posts: 5983
- Joined: Tue Jan 22, 2008 1:55 pm
- Member's Photo Album: http://www.delica.ca/Photos/index.php?cat=11103
- Vehicle: Delica; Chamonix GLX ('92 P25W)
- Location: North Van, BC, eh?
Re: Prepping for paint
Okay Joe,
The cowling over the bambi bars is held on by roughly 19 screws and about five snaps. First you have to remove the bush lights (eight screws) and in order to do that you first have to disconnect them. This is done by lying on your back, looking up into the assembly and there is a wire that is held in place by two bendable hooks ~ when you see the wire just run your fingers over it and you will find the hooks, bend them back and free the wire. Now it is easier to disconnect the plugs (two each). They look like micro Xmas crackers ~ pinch both ends and pull (they don't go bang, mind). Now undo the screws holding the lights and the mounts for the lights.
Note from these pictures what the light plugs look like.
Next is the lid which is held on by about five snaps that are attached to the bottom, on the body side of the lid. It looks like this:
The forward lip of the "lid" is tucked under the main cowling body so you lift the rear end of the lid first then slide it out and you should be left with something like this:
From this picture you can see where the snaps go and that they will be located in that corresponding area under the lid.
As you take it apart there will be a number of small pieces ~ don't loose them.
From here you will see how the Cowling comes out. There are smaller pieces that are held on by one screw ~ I would leave them for last. Once unscrewed the cowling should pretty much slide out forward. If your van is like mine you might find that the screws may be a little seized with age, avoid stripping them or snapping them as I did to one!
Once the cowling is off the bambi bars will look like this:
The bambi bars are held on by six bolts: Two upper left; two upper right; one underneath left and one underneath right. That should remove the bambi bars.
Then there are all the other bars, look around you ought to find them.
Regarding preparing the paint surface: Go down to White & Peters on Pemberton Avenue (they will be in the telephone directory) and buy a product called "Tumbler". It is a solvent that is designed to remove wax products from the paint surface of a vehicle destined to be painted. Be sure to where rubber gloves when using it (dish washing gloves will work) and work in a well ventilated area, like outside, nasty stuff but is works.
When painting a vehicle one really ought to remove things like the lights and stripping, too. Perhaps you might let the auto-body guys do that... it is a lot of work.
One other point you might consider: When you have removed all the bars you have removed all your bumpers ~ so avoid hitting anything... smiles. Good Luck!
Falco.
P.S.: There are products on the market that will totally rejuvenate the vinyl, rubber and plastic parts of your van. "Mothers Back To Black" is one: Ten bucks at Lordco or Cdn Tire. Autoglym is another (as seen in photo with lights), you will find that at a place called "Overseas Auto" on Fourth and Main in Vancouver. It is around fifteen bucks. When I got the Miss Lil' Bitchi, all the plastic, vinyl & rubber were heavily greyed and streaked ~ I have used both products and I would go with the Autoglym. It costs more but it is a superior product.
The cowling over the bambi bars is held on by roughly 19 screws and about five snaps. First you have to remove the bush lights (eight screws) and in order to do that you first have to disconnect them. This is done by lying on your back, looking up into the assembly and there is a wire that is held in place by two bendable hooks ~ when you see the wire just run your fingers over it and you will find the hooks, bend them back and free the wire. Now it is easier to disconnect the plugs (two each). They look like micro Xmas crackers ~ pinch both ends and pull (they don't go bang, mind). Now undo the screws holding the lights and the mounts for the lights.
- Cowling removal.jpg (20.03 KiB) Viewed 5697 times
- Bush Lights.jpg (14.72 KiB) Viewed 5697 times
Next is the lid which is held on by about five snaps that are attached to the bottom, on the body side of the lid. It looks like this:
- Cowling Lid.jpg (22.55 KiB) Viewed 5698 times
- Cowling with lid off.jpg (19.45 KiB) Viewed 5697 times
As you take it apart there will be a number of small pieces ~ don't loose them.
- Cowling Pieces.jpg (9.44 KiB) Viewed 5698 times
Once the cowling is off the bambi bars will look like this:
- The Bambi Bars.jpg (29.29 KiB) Viewed 5697 times
Then there are all the other bars, look around you ought to find them.
Regarding preparing the paint surface: Go down to White & Peters on Pemberton Avenue (they will be in the telephone directory) and buy a product called "Tumbler". It is a solvent that is designed to remove wax products from the paint surface of a vehicle destined to be painted. Be sure to where rubber gloves when using it (dish washing gloves will work) and work in a well ventilated area, like outside, nasty stuff but is works.
When painting a vehicle one really ought to remove things like the lights and stripping, too. Perhaps you might let the auto-body guys do that... it is a lot of work.
One other point you might consider: When you have removed all the bars you have removed all your bumpers ~ so avoid hitting anything... smiles. Good Luck!
Falco.
P.S.: There are products on the market that will totally rejuvenate the vinyl, rubber and plastic parts of your van. "Mothers Back To Black" is one: Ten bucks at Lordco or Cdn Tire. Autoglym is another (as seen in photo with lights), you will find that at a place called "Overseas Auto" on Fourth and Main in Vancouver. It is around fifteen bucks. When I got the Miss Lil' Bitchi, all the plastic, vinyl & rubber were heavily greyed and streaked ~ I have used both products and I would go with the Autoglym. It costs more but it is a superior product.
Sent from my smart pad, using a pen.
Seek Beauty... Good Ship Miss Lil' Bitchi
...... Vision without action is a daydream. Action without vision is a nightmare. ~ Japanese Proverb
Seek Beauty...
Good Ship Miss Lil' Bitchi...... Vision without action is a daydream. Action without vision is a nightmare. ~ Japanese Proverb
-
Mystery Machine
- Posts: 510
- Joined: Fri Dec 08, 2006 12:06 pm
- Location: Bristol (UK)
Re: Prepping for paint
Sorry Joe - I forgot that the 'OEM' fog lights are removed from above as Falco says (in his far better description! ) I'm used to removing aftermarket lights which are always fixed from underneath and much easier to remove (1 x nut and the light comes off)
Removing the shroud is easier once the bar is off the vehicle though, so do bear this in mind.
Falco - nice description.....I always love the little labels/tags you have to remind you of which side/where the item came off. Next time your shroud is looking a bit faded, try the hot-air gun technique - I think you'll be surprised. You can always finish it off with some Auto Glym for an extra black finish but just the hot air on its own is pretty dramatic!
L300 Mystery Machine (High Altitude Edition )
L300 MudMonkey ($400 bargain banger!! )
L300 MudMonkey ($400 bargain banger!!
-
FalcoColumbarius
- Site Admin
- Posts: 5983
- Joined: Tue Jan 22, 2008 1:55 pm
- Member's Photo Album: http://www.delica.ca/Photos/index.php?cat=11103
- Vehicle: Delica; Chamonix GLX ('92 P25W)
- Location: North Van, BC, eh?
Re: Prepping for paint
You know MM, I was going to say the samething to you ~ nice description.
I have seen the heat gunned "shrouds" (I like that name) and when done well they do look stunning! When I first did the shroud I couldn't figure out how to get the damn thing off so I did it in place and the thought of using the heat gun that close to the paint job made me a little timid. I have also been using the Autoglym on items like the tail lights and worry that a heat gun might crack the plastic. By the way, the Autoglym is really good for rejuvenating items made of clear plastic, like the window eves ~ totally removes the bluey haze. It also helps to hide the spider cracks in the perspex cover, over my fogs. Either way, Joe... avoid the paint job with these products or the heat gun, even if you are repainting it.
Falco.
Sent from my smart pad, using a pen.
Seek Beauty... Good Ship Miss Lil' Bitchi
...... Vision without action is a daydream. Action without vision is a nightmare. ~ Japanese Proverb
Seek Beauty...
Good Ship Miss Lil' Bitchi...... Vision without action is a daydream. Action without vision is a nightmare. ~ Japanese Proverb
-
Mystery Machine
- Posts: 510
- Joined: Fri Dec 08, 2006 12:06 pm
- Location: Bristol (UK)
Re: Prepping for paint
I have only tried the heatgun on the shroud so far, but was going to have a go with it on the rear step soon (taking el mucho care to avoid the surrounding paint!)
I also want to see if it will work on the rear parking mirror - but I doubt it because it's a different type of plastic. I'll probably use the Auto Glym stuff like you have for all other plastics - I have the same stuff in my garage and think its brilliant! (Auto Glym is available in pretty much every auto shop here in the UK - I have quite a few of their products in the garage)
I also want to see if it will work on the rear parking mirror - but I doubt it because it's a different type of plastic. I'll probably use the Auto Glym stuff like you have for all other plastics - I have the same stuff in my garage and think its brilliant! (Auto Glym is available in pretty much every auto shop here in the UK - I have quite a few of their products in the garage)
L300 Mystery Machine (High Altitude Edition )
L300 MudMonkey ($400 bargain banger!! )
L300 MudMonkey ($400 bargain banger!!
-
joedelica
- Posts: 204
- Joined: Tue Jan 08, 2008 10:14 pm
- Member's Photo Album: http://www.delica.ca/Photos/
- Vehicle: 95 Exceed XR The Sapporo Can
- Location: VanCity
- Location: VanCity
Re: Prepping for paint
Thanks so much you two! You both have been a great source of Deli info for me.
Cheers,
Joe
Cheers,
Joe
-
FalcoColumbarius
- Site Admin
- Posts: 5983
- Joined: Tue Jan 22, 2008 1:55 pm
- Member's Photo Album: http://www.delica.ca/Photos/index.php?cat=11103
- Vehicle: Delica; Chamonix GLX ('92 P25W)
- Location: North Van, BC, eh?
Re: Prepping for paint
No worries, Joe ~ Glad to be of help! If you are ever in North Van and fancy a coffee and a chat ~ drop me a line (PM) and we can compare Delicas and experiences.
I tried the "Mothers" on the rear mirror, MM and to no avail. Mind you, I had tried the Mothers on the fogs and that was the same result but when I used the Auto Glym on the fogs they both went black so one of these days I will try the Auto Glym on the mirror. I have much of the Auto Glym line and I too think it's the cat's arse. I understand that the Queen is out using this product on her Jags every Sunday. I first discovered this product when I was painting goalie masques (hockey) and then I stopped painting them (no money in it) but I remembered the Auto Glym. Over here, it is not so readily available but there are some places where you can get it.
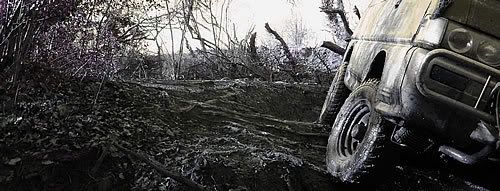
I think the waxing of the paint job is essential, especially if you go off road. It makes the wash up a lot easier and provides a certain amount of protection from branches, like sap for instance. However, if you prefer the "badass=muddy" look then I would not use the wax on the paint as most of the mud tends to slide off of the van and you stand out as the prissy one of the bunch.
Another product I use is this Anti-seize stuff that one brushes on the threads of screws and bolts, i.e.; the ones that hold the shroud on (once you have managed to get them off!)
Unfortunately the only picture I have of the stuff doesn't show the whole label. Hopefully you will recognize the bottle when you see it.
Falco.
I tried the "Mothers" on the rear mirror, MM and to no avail. Mind you, I had tried the Mothers on the fogs and that was the same result but when I used the Auto Glym on the fogs they both went black so one of these days I will try the Auto Glym on the mirror. I have much of the Auto Glym line and I too think it's the cat's arse. I understand that the Queen is out using this product on her Jags every Sunday. I first discovered this product when I was painting goalie masques (hockey) and then I stopped painting them (no money in it) but I remembered the Auto Glym. Over here, it is not so readily available but there are some places where you can get it.
I think the waxing of the paint job is essential, especially if you go off road. It makes the wash up a lot easier and provides a certain amount of protection from branches, like sap for instance. However, if you prefer the "badass=muddy" look then I would not use the wax on the paint as most of the mud tends to slide off of the van and you stand out as the prissy one of the bunch.
Another product I use is this Anti-seize stuff that one brushes on the threads of screws and bolts, i.e.; the ones that hold the shroud on (once you have managed to get them off!)
- Anti-seize Stuff.jpg (6.58 KiB) Viewed 5602 times
Falco.
Sent from my smart pad, using a pen.
Seek Beauty... Good Ship Miss Lil' Bitchi
...... Vision without action is a daydream. Action without vision is a nightmare. ~ Japanese Proverb
Seek Beauty...
Good Ship Miss Lil' Bitchi...... Vision without action is a daydream. Action without vision is a nightmare. ~ Japanese Proverb
-
jessef

- Posts: 6459
- Joined: Tue Feb 26, 2008 1:27 pm
- Vehicle: JDM flavour of the month
- Location: Vancouver
- Location: Vancouver, BC
Re: Prepping for paint
I used the heat gun on the rear.
Worked out great. 10 mins.
Worked out great. 10 mins.
-
Erebus

- Posts: 1369
- Joined: Mon May 28, 2007 7:55 pm
- Member's Photo Album: http://www.delica.ca/Photos/
- Vehicle: 1992 Super Exceed
- Location: Edmonton, Alberta
- Location: Edmonton (was Calgary until 2017), Alberta, Canada
- Contact:
Re: Prepping for paint
I used Mothers Back to Black on my back bumper. Looked great for a couple of days, then it gradually faded back to grey over a period of weeks. I then did 1/2 of the top of the bambi-bar cover so I can compare. It has already faded some in a week. So I don't recommend it. I'll try the Autoglym or heatgun next.
 "I could be just around the corner from heaven, or a mile from hell." -- Jackson Browne, "The road and the sky".
-
FalcoColumbarius
- Site Admin
- Posts: 5983
- Joined: Tue Jan 22, 2008 1:55 pm
- Member's Photo Album: http://www.delica.ca/Photos/index.php?cat=11103
- Vehicle: Delica; Chamonix GLX ('92 P25W)
- Location: North Van, BC, eh?
Re: Prepping for paint
Where my mind set is at, Erebus, is treating the van as my "ship"; my father was in the RN and I relate to things that way. There is never an idle moment on a ship and even when there appears to be idle time, one can always polish the brass (actual meaning, not figurative). When I first addressed the shroud on the Miss Lil' Bitchi it took two applications to get it black with the Mothers. I have coated it twice since then, the last time with the Auto Glym. Any time I clean it now it is just that, just cleaning it as opposed to restoring it. In this respect it is much like polishing the brass. The back step is much the same, although it collects water more than the shroud on the front, which will make it streaky faster. My philosophy is that the more I clean the van the better it is protected and the better I understand the workings of the van. The Auto Glym is definitely superior, in my opinion.Erebus wrote:I used Mothers Back to Black on my back bumper. Looked great for a couple of days, then it gradually faded back to grey over a period of weeks. I then did 1/2 of the top of the bambi-bar cover so I can compare. It has already faded some in a week. So I don't recommend it. I'll try the Autoglym or heatgun next.
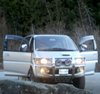
Having just got back from a road trip I will be posting pictures that include the van that show the shroud under extreme conditions and you will see that it is still holding up.
Falco.
Sent from my smart pad, using a pen.
Seek Beauty... Good Ship Miss Lil' Bitchi
...... Vision without action is a daydream. Action without vision is a nightmare. ~ Japanese Proverb
Seek Beauty...
Good Ship Miss Lil' Bitchi...... Vision without action is a daydream. Action without vision is a nightmare. ~ Japanese Proverb