Unlike most Deli owners - I didn't want a permanent camper conversion. Something more part-time was required as I quite often have 5 or more people in Shaun Van Ramen.
The idea occurred to me (After scoping everyone else's mods) to remove the rear bench and bolt something in it's place.
After a few drawings I decided on a split steel frame design for a few reasons;
Easy to get in and out.
Stackable in the back - so middle seats can be used.
Big chunk of material was free.
Total cost - Maybe $60 (*dinner not included)
You might be thinking "Steel - 1.25" sq. tube - must be heavy?"
Has anyone taken out the back bench - Haven't weighed it but the trade-off is close to the same - so no problems there.
It utilized the bench bolts/mounts, Sits 14" off the floor (storage / clear mid-seats) and takes all of 15-20 minutes to install.
I acquired an ATV crate frame from a Honda dealer I know (FREE!!) and a good friend is in to metal fabing. (*That will cost me a dinner for sure).
The Job
I had to cut/grind all the excess tabs and bits off the crate. Cut in half. Making the mounting brackets was about a 3-4 hour job. Then a good coat of New Caterpillar Yellow from Crappy Tire.
All I need now is the plywood deck and she is good to go.
SvanR's Temporary Camper Conversion
Moderator: BCDelica
-
Shaun Van Ramen

- Posts: 324
- Joined: Wed Nov 03, 2010 1:56 pm
- Member's Photo Album: http://www.delica.ca/Photos/
- Vehicle: '91 Exceed
- Location: Vancouver, BC
SvanR's Temporary Camper Conversion
- Attachments
-
- The frame in place - awaiting some ply, futon and sleepers.
- Delibed_06.jpg (77.76 KiB) Viewed 4575 times
-
- The frame before being joined together.
- Delibed_05.jpg (87.11 KiB) Viewed 4575 times
-
- The slider insert.
- Delibed_04.jpg (72.79 KiB) Viewed 4575 times
-
- Pop in front legs.
- delibed_03.jpg (70.1 KiB) Viewed 4575 times
-
- Bolted in place.
- Delibed_02.jpg (64.77 KiB) Viewed 4575 times
-
- Fabricating the mount brackets
- Delibed_01.jpg (63.83 KiB) Viewed 4575 times
Last edited by Shaun Van Ramen on Wed Jun 01, 2011 10:23 am, edited 1 time in total.
BAHahahahahahaha

Re: SvanR's Temp Bed
You got all that square steel from 1 ATV crate??
-
Shaun Van Ramen
- Posts: 324
- Joined: Wed Nov 03, 2010 1:56 pm
- Member's Photo Album: http://www.delica.ca/Photos/
- Vehicle: '91 Exceed
- Location: Vancouver, BC
Re: SvanR's Temp Bed
Yes - it is the base of the crate for an ATV. I also got the upright supports (Bent 1-1.5" steel tube). Here is the crate base before I went to it with an angle grinder. The red markings are all the bits I had to take off. Ignore the yellow as I ended up cutting in half (not thirds).
The best part was that the base was very close to my needed measurements (off in width by maybe 5" but I could live with that.)
The best part was that the base was very close to my needed measurements (off in width by maybe 5" but I could live with that.)
- Attachments
-
- The crate frame before cutting.
- deliBed1.jpg (174.66 KiB) Viewed 4481 times
BAHahahahahahaha
-
delicat

- Posts: 2331
- Joined: Thu Jul 26, 2007 6:26 pm
- Member's Photo Album: http://www.delica.ca/Photos/
- Vehicle: '92 Exeed '93 Safari '94 Pajero
- Location: New Westminster, BC
- Location: New Westminster, BC
Re: SvanR's Temporary Camper Conversion
Nice work mate and great find! I'm in the same boat where I can't have a full on camper set up as I have two kids who love to ride with me so compartments or non permanent is the way to go. Well done!
'93 Nissan Patrol
'94 Mitsubishi Pajero
"If it ain't broken, modify it!"
'94 Mitsubishi Pajero
"If it ain't broken, modify it!"
-
Shaun Van Ramen
- Posts: 324
- Joined: Wed Nov 03, 2010 1:56 pm
- Member's Photo Album: http://www.delica.ca/Photos/
- Vehicle: '91 Exceed
- Location: Vancouver, BC
Re: SvanR's Temporary Camper Conversion
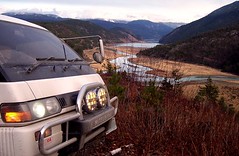
Here is the finished bed and this weekend we popped SvR's camping cherry.
It worked out nice and by shear coincidence the height is perfect so when I sit up I do not tag my noodle on the roof.
The finished touch was 2 - half sheets of 1/2" ply (fir, one side good) and the old futon.
It worked out nice and by shear coincidence the height is perfect so when I sit up I do not tag my noodle on the roof.
The finished touch was 2 - half sheets of 1/2" ply (fir, one side good) and the old futon.
- Attachments
-
- Everything packs up neatly during transport and the mid-buckets are still usable.
- Delibed_02B.jpg (115.37 KiB) Viewed 4141 times
-
- The side entrance.
- Delibed_03B.jpg (130.47 KiB) Viewed 4141 times
-
- 14" of under storage.
- Delibed_01B.jpg (104.68 KiB) Viewed 4141 times
BAHahahahahahaha