Sorry guys, not the tube that is under the large plastic bumper but the (formerly) black dimpled insert/step that is built into the bumper. Right in the top/middle of the bumper. Anyone ever taken this out, or can it even be taken out?
http://www.delica.ca/manuals/L-400%20Ma ... TERIOR.pdf PAGE 4
Craig
Sprucing up the Bull Guard - Finished.
-
CREGAN

- Posts: 1094
- Joined: Thu Sep 24, 2009 8:05 am
- Member's Photo Album: http://www.delica.ca/Photos/
- Vehicle: 94 L400 SpaceGear Super Exceed
- Location: Leduc, Alberta
-
Fishtank

- Posts: 320
- Joined: Sat Mar 17, 2007 11:17 pm
- Vehicle: 1994 Spacegear Exceed LWB Tall
- Location: Okanagan
- Location: Penticton
Re: Sprucing up the bull guard shroud
From what I've seen this bumper is all one piece. If you need to, I'd just clean it up really good and rocker guard it.
GL Craig.
GL Craig.
-
jessef

- Posts: 6459
- Joined: Tue Feb 26, 2008 1:27 pm
- Vehicle: JDM flavour of the month
- Location: Vancouver
- Location: Vancouver, BC
Re: Sprucing up the bull guard shroud
It can be removed. You need to remove the rear quarter panel covers first.
Then the main bumper.
You may find it easier to mask off the body section and sand/paint the bumper on the rig like Fishtank suggested. That's what I'd do.
Then the main bumper.
You may find it easier to mask off the body section and sand/paint the bumper on the rig like Fishtank suggested. That's what I'd do.
-
CREGAN
- Posts: 1094
- Joined: Thu Sep 24, 2009 8:05 am
- Member's Photo Album: http://www.delica.ca/Photos/
- Vehicle: 94 L400 SpaceGear Super Exceed
- Location: Leduc, Alberta
Re: Sprucing up the bull guard shroud
Agreed, now after carefully looking at the PDF and the actual bumper. I have masked and painted alot with my VW so It can be done. Hoping to get some time to do it soon.jfarsang wrote: You may find it easier to mask off the body section and sand/paint the bumper on the rig like Fishtank suggested. That's what I'd do.
Craig
-
Jungle Jon
- Posts: 237
- Joined: Wed Nov 22, 2006 12:46 pm
- Vehicle: Toyota Tacoma
- Location: Calgary, AB, CA
Re: Sprucing up the bull guard shroud
I've tried this and wouldn't recommend it. Short term, it looks good (as long as you can avoid melting things) but it eventually fades again, and looks blotchy. From what I've read it also makes the plastic more brittle.dbox wrote:I saw a post on either the AUS or UK (or was it CAN) site about someone who used a heat gun to bring back the black to the plastic. Something I have planned to do but have not yet done.
Stick with the Mother's Back to Black, or that Krylon satin fusion stuff sounds interesting too.
-
jessef
- Posts: 6459
- Joined: Tue Feb 26, 2008 1:27 pm
- Vehicle: JDM flavour of the month
- Location: Vancouver
- Location: Vancouver, BC
Re: Sprucing up the bull guard shroud
Falco's the master at this stuff. His 'blackness' looks better than newJungle Jon wrote:I've tried this and wouldn't recommend it. Short term, it looks good (as long as you can avoid melting things) but it eventually fades again, and looks blotchy. From what I've read it also makes the plastic more brittle.dbox wrote:I saw a post on either the AUS or UK (or was it CAN) site about someone who used a heat gun to bring back the black to the plastic. Something I have planned to do but have not yet done.
Stick with the Mother's Back to Black, or that Krylon satin fusion stuff sounds interesting too.
http://www.delica.ca/forum/what-restore ... 10940.html
FalcoColumbarius wrote:I use a product called "Auto Glym", which used to be hard to find but is now becoming more readily available at Canadian Tire. It oils the plastic and seals it. Other products like "Mothers Back To Black" do a great job oiling the plastic but leave a sticky residue that attracts dust. Dust sucks the oils out of the plastic. For instance: I detailed my wagon then went on a long road trip with my son, off into the toolies. All dirt roads out there. I noticed that the rear mirror, tail lights & step were fading much faster than say the shroud over the bambie bars. This is due in part to the dust off the road landing on my tailgate. So the sealing feature of the product is important.
I agree with Deli1733 that the heat gun will ultimately crack the plastic (or vinyl) as it attracts the oils from deeper in the plastic up to the surface, which then evaporates.
I don't think I would want to paint the plastic, myself ~ you would need a good plastic paint such as Krylon Fusion. For me... it would be like painting over a French polished mahogany with Tremclad. Rhino Liner? Maybe for the shroud or the rear step but what about the tail lights? Not something I would do.
Falco.
-
CREGAN
- Posts: 1094
- Joined: Thu Sep 24, 2009 8:05 am
- Member's Photo Album: http://www.delica.ca/Photos/
- Vehicle: 94 L400 SpaceGear Super Exceed
- Location: Leduc, Alberta
Re: Sprucing up the bull guard shroud
Falco has been guiding me on the using the Glym (kind of like Jedi stuff) and I have purchased a bottle. It is sitting on the counter in my garage collecting dust (the dust does not stick though  ). I am torn between the 2 procedures. I have painted stuff with Krylon before and had success and a few failures. The failures were because there was wax residue still there even after cleaning with rubbbing alcohol, wax remover, brake cleaner. It caused the paint to fish-eye. I am tempted to do the Auto-Glym but if I should do it and then decide I want to paint it, it would be a bitch to get it clean enough to remove the residue in order to paint. That is my delema. All I want is it to look like new, all fancy-schmancy. Right now I think the charcoal grey look makes it look old. Oh wait, it is.
Craig
Craig
-
FalcoColumbarius
- Site Admin
- Posts: 5983
- Joined: Tue Jan 22, 2008 1:55 pm
- Member's Photo Album: http://www.delica.ca/Photos/index.php?cat=11103
- Vehicle: Delica; Chamonix GLX ('92 P25W)
- Location: North Van, BC, eh?
Re: Sprucing up the bull guard shroud
I happen to like Auto Glym ~ who knows I might even get paid for this one day  . In the meantime there are many products to choose from, many of which I have never tried, like Zymol, listed as slightly better than Auto Glym. Or there is Carbrite, which is very popular amongst a few professionals I know. The Queen uses Auto Glym on her Jaguar Daimler (apparently up for sale: 1984 Daimler Double Six LWB Saloon. 41,000 miles), Her Majesty is down in the Royal Garage on Sunday afternoons with an old pair of knickers getting that glass finish...
One thing you might want to remember, Grasshopper, the vinyl shroud is made of oil and that is likely affect the paint job regardless of how many ketones you shock the surface down with. We live in a world of attrition ~ everything is born to die and the sun is burning overhead ~ there is no one-time fix-all. I do my vinyl & plastic once or twice a year (sometimes more because I feel like it), like polishing the brass. I do my door seals with silicon once in a while, as well ~ it helps to keep the water out of the wagon when fording. Consider your Delica as a ship, or a close friend. Look after her and she will look after you. Well, that's my philosophy and I think I'll get another Maudite to wash down that lamb chop. Save the Krylon for your axle or something, or for your garden furniture.
Falco.
Sent from my smart pad, using a pen.
Seek Beauty...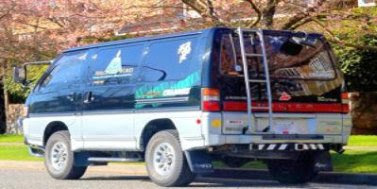 Good Ship Miss Lil' Bitchi
...... Vision without action is a daydream. Action without vision is a nightmare. ~ Japanese Proverb
Seek Beauty...
Good Ship Miss Lil' Bitchi...... Vision without action is a daydream. Action without vision is a nightmare. ~ Japanese Proverb
-
CREGAN
- Posts: 1094
- Joined: Thu Sep 24, 2009 8:05 am
- Member's Photo Album: http://www.delica.ca/Photos/
- Vehicle: 94 L400 SpaceGear Super Exceed
- Location: Leduc, Alberta
Re: Sprucing up the bull guard shroud
All I picture is the queen buffing with nasty old knickers now.
-
CREGAN
- Posts: 1094
- Joined: Thu Sep 24, 2009 8:05 am
- Member's Photo Album: http://www.delica.ca/Photos/
- Vehicle: 94 L400 SpaceGear Super Exceed
- Location: Leduc, Alberta
Re: Sprucing up the bull guard shroud
Alright - Project underway! I have decided to show some before photos so we can compare and contrast when the project is finished.
I first decided to start with my fog lamps.
One has never worked since I bought the van, so I was considering upgrading to a new set but I really do love the gigantor look of these things. This almost never came to be as my mechanic here in Edmonton accidently ran the non-functioning one into the hoist and cracked the grill and dented it a bit. I had almost given up on them but he glued the shield back together and I decided that since I have spent so much money on other repairs (another long story) that I will have to live with them. A couple weeks ago I decided to turn them, or it, on and to my surprise there were 2 working. By the time I got home I had only one again so I decided to check out the wiring. Seemed to be some sort of short inside the lamp. Fast forward to a couple weeks ago and my new Rugged Ridge brackets came in. They are sweet and so much more sturdy than my old ones. So I took off the lamp in question and VERY carefully was able to slide the protector off without cracking it. Once I removed the lense the culprate was visible. The wire going to the H3 Bulb was burnt and completely severed. So I have ordered a new set of bulbs off Fleebay for a very reasonable price. I cleaned the whole lamp inside and out so it is ready to go back on.
Now I have run into a snag. It is not as easy as I thought it appeared to remove the plastic shroud from the bull guard. I removed the 4 visible screws and popped out the few remaining plastic rivet things (which all broke BTW - so if anyone has a bead on new ones I would love to get my hands on them) and it is still on there tight. Does anyone have any experience in taking the thing off (Jesse)? After careful deliberation I have decided to paint. Krylon Fusion Satin Black. I am going to pick off the remaining letters and paint it up. I have picked one off and they leave behind this gummy adhesive crap. Anyone know how to remove this? I was thinking rubbing alcohol or goo gone. I was going to leave it black with no letter but I put out a call to our brothers overseas as I remembered seeing that someone on ebay.uk was selling them. Someone (forum name hillbilly - ironic I know) responded that he had bought some for his van and lost them, then sold the van and found them - so he offered to send them to me airmail for free! Sweet - many thanks for that. So anyway, once I get some info on how to remove the shroud I will post more pics. Sorry for being long winded but I am babysitting as my wife is working and our kid is asleep so I am bored!
Craig
I first decided to start with my fog lamps.
- Fog Lamp Bracket OLD
- Optimized-IMG_7796.JPG (47.39 KiB) Viewed 4504 times
- Comparison between brackets
- Optimized-IMG_7802.JPG (80.91 KiB) Viewed 4504 times
- Spiffy lamps
- Optimized-IMG_7805.JPG (92.72 KiB) Viewed 4504 times
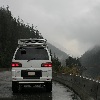
- Front end before 2
- Optimized-IMG_7795.JPG (58.22 KiB) Viewed 4504 times
- Front end before
- Optimized-IMG_7793.JPG (53.69 KiB) Viewed 4504 times
- Rear step
- Optimized-IMG_7798.JPG (58.56 KiB) Viewed 4504 times
Craig
-
CREGAN
- Posts: 1094
- Joined: Thu Sep 24, 2009 8:05 am
- Member's Photo Album: http://www.delica.ca/Photos/
- Vehicle: 94 L400 SpaceGear Super Exceed
- Location: Leduc, Alberta
Re: Sprucing up the bull guard shroud
OK Round 2 - Removal of Bull Guard.
I found through asking a lot of questions on our overseas friends website that the best way to get the shroud off is to pull the whole bull guard. They even supplied me with schematics on how to do it, but it was not very hard. 4 bolts in the front and 3 underneath (One is up a ways so you will have to remove the plastic shroud covering your oil filter. Once off I found some amazing things. Besides the van now looking like a Pontiac Firefly on Steroids, I found 17 years worth of grime, a few rusty bolts and a rather large dragon-fly (may not be Japanese though as we do have a lot around here!)
So I took the bull guard apart as it is in three sections and the shroud cam off very easily. Pressure washed everything and have it ready to paint. I am going to use some Meguires cleaner wax for all the areas under the shroud so that it will hopefully to keep some of this gunk from sticking around.
I have a few questions to ask all the Guru's:
Should I try to replace some of the rusty old bolts with new ones?
I am going to repaint the middle section of the bull guard since it was under the shroud rusting a bit. What kind of paint should I use (I was thinking Rustoleum) and should I prime it first?
Does anyone have any recomendations on how to clean chrome? I found some rust on the chrome and I am not sure what to do with that.
Thanks - Back in a few days with a completed paint job.
Craig
I found through asking a lot of questions on our overseas friends website that the best way to get the shroud off is to pull the whole bull guard. They even supplied me with schematics on how to do it, but it was not very hard. 4 bolts in the front and 3 underneath (One is up a ways so you will have to remove the plastic shroud covering your oil filter. Once off I found some amazing things. Besides the van now looking like a Pontiac Firefly on Steroids, I found 17 years worth of grime, a few rusty bolts and a rather large dragon-fly (may not be Japanese though as we do have a lot around here!)
- Optimized-IMG_7816.JPG (72.33 KiB) Viewed 4483 times
- Optimized-IMG_7827.JPG (43.72 KiB) Viewed 4483 times
- Optimized-IMG_7820.JPG (50.35 KiB) Viewed 4483 times
- Optimized-IMG_7822.JPG (79.41 KiB) Viewed 4483 times
- Optimized-IMG_7825.JPG (94.21 KiB) Viewed 4483 times
- Optimized-IMG_7826.JPG (77.13 KiB) Viewed 4483 times
Should I try to replace some of the rusty old bolts with new ones?
I am going to repaint the middle section of the bull guard since it was under the shroud rusting a bit. What kind of paint should I use (I was thinking Rustoleum) and should I prime it first?
Does anyone have any recomendations on how to clean chrome? I found some rust on the chrome and I am not sure what to do with that.
Thanks - Back in a few days with a completed paint job.
Craig
-
CREGAN
- Posts: 1094
- Joined: Thu Sep 24, 2009 8:05 am
- Member's Photo Album: http://www.delica.ca/Photos/
- Vehicle: 94 L400 SpaceGear Super Exceed
- Location: Leduc, Alberta
Re: Sprucing up the bull guard shroud
Finished painting today. F-ing sweet! Got my decals Air-Mailed from England also today. Double F-ing sweet!! Will post more when it is back on.
Craig
Craig

-
CREGAN
- Posts: 1094
- Joined: Thu Sep 24, 2009 8:05 am
- Member's Photo Album: http://www.delica.ca/Photos/
- Vehicle: 94 L400 SpaceGear Super Exceed
- Location: Leduc, Alberta
Re: Sprucing up the bull guard shroud
I don't quite know what that means. Does it mean you like to dance? Watch out for the truck coming from over there?jfarsang wrote:
Craig
-
jessef
- Posts: 6459
- Joined: Tue Feb 26, 2008 1:27 pm
- Vehicle: JDM flavour of the month
- Location: Vancouver
- Location: Vancouver, BC
Re: Sprucing up the bull guard shroud
can't wait to see the finished product 