I've been reading with great interest your post on headlights (HERE) and the problems you are having with getting the lights correct for your roads.
Early in the post I noted a comment from lost1 about changing the beam pattern:
This was probably based on my comments from MDOCUK a year or so ago because I did exactly that with my Z1 and my Barchetta because these both have 'projector' lamps like the Delica: SEE POST HERElost1 wrote:From what I understand you can rotate the interior lens 180 degrees and then reglue the whole works back together. BMW had the same system for their cars, but the lenses weren't glued together so it was just a question of opening them and rotating the lens.
Here is my PRIDE & JOY - my Z1:

and here is my Barchetta (bought for my Girlfriend, but I always seem to drive it!

Anyway - back on topic! :lol:
I decided to have a go at solving this problem for you lot in Canada because none of you seem keen enough to go ripping your headlights apart!
I would have thought one of you would have tried this, but either you are all very cautious over there, or I don't mind risking my headlight for the sake of helping you! :lol: :lol:
Sadly the outcome is not what I was hoping for! :( It seems Mitsubishi had different ideas about the beam pattern compared to the lamps in my other two cars!
Here is what I have done (beat baking cakes ANY day! :lol: :lol: )
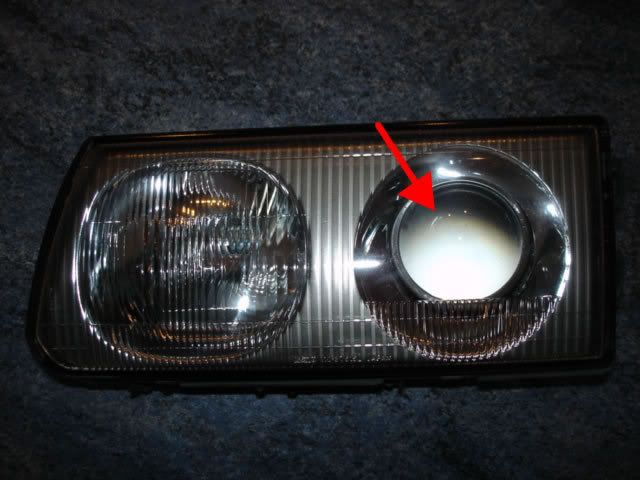
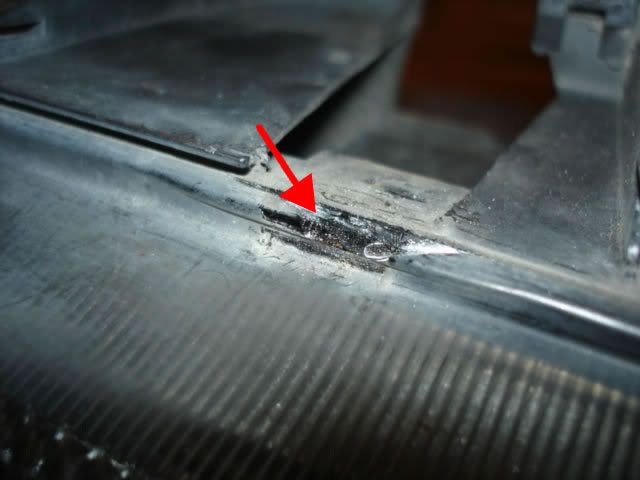
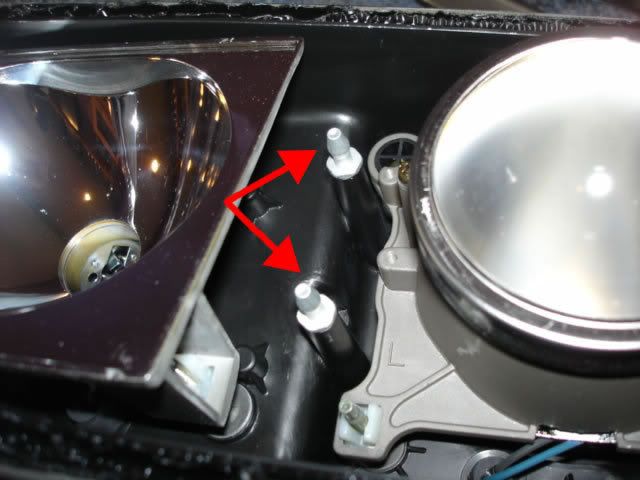
1) Remove headlight unit and bring indoors from the cold and the wet! (the arrow shows the part of the light unit we need to sort out)
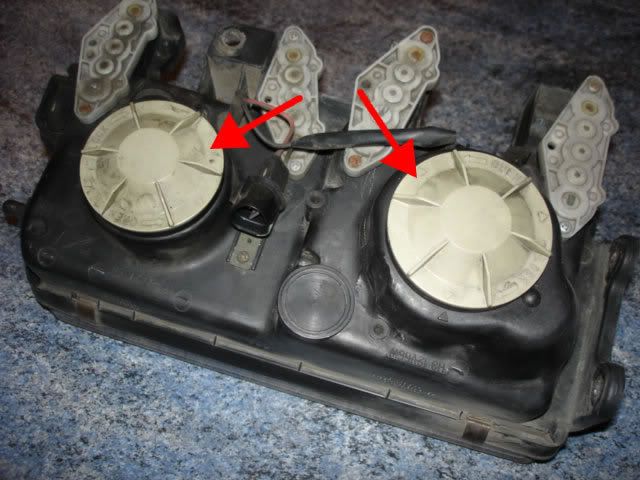
2) Undo and remove the two bulb caps/covers from the back of the unit
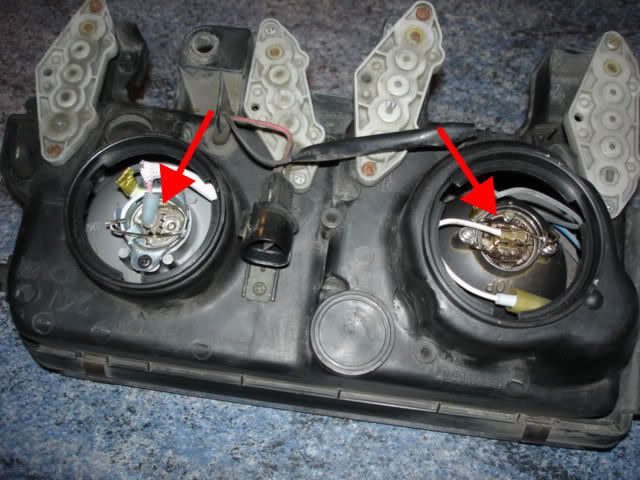
3) Remove the bulbs (wiring can be left in)
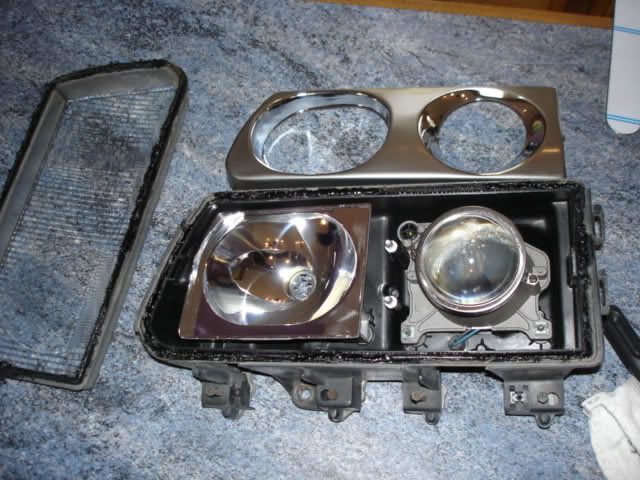
4) Carefully 'pop' off the four clips from around the lens
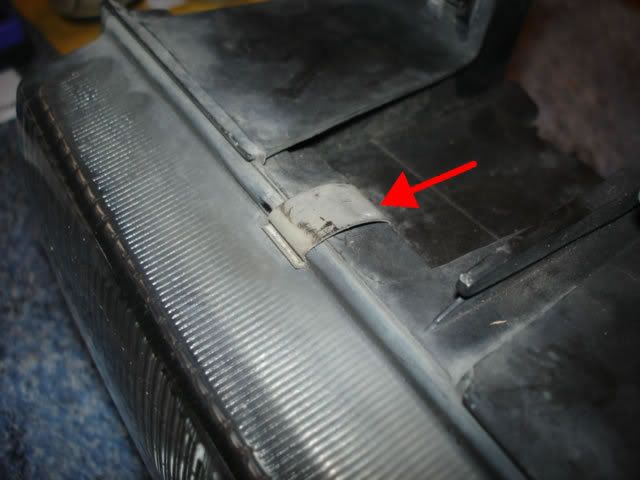
5) Be very careful removing the clips - I managed to chip the glass on one of them!
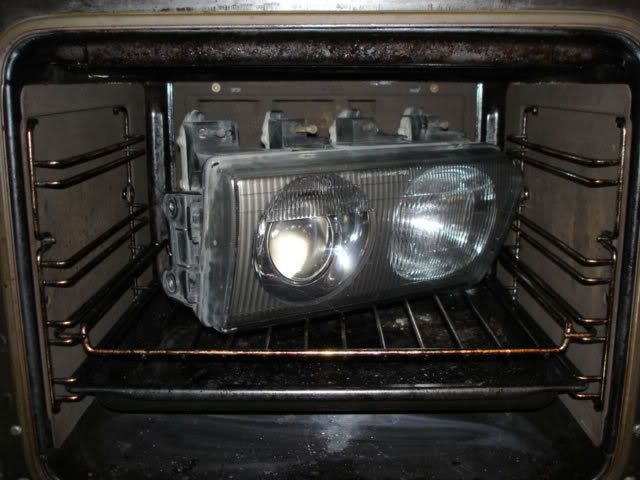
6) Stick the whole unit in the oven for 50 mins @ 70/80 degrees Celcius
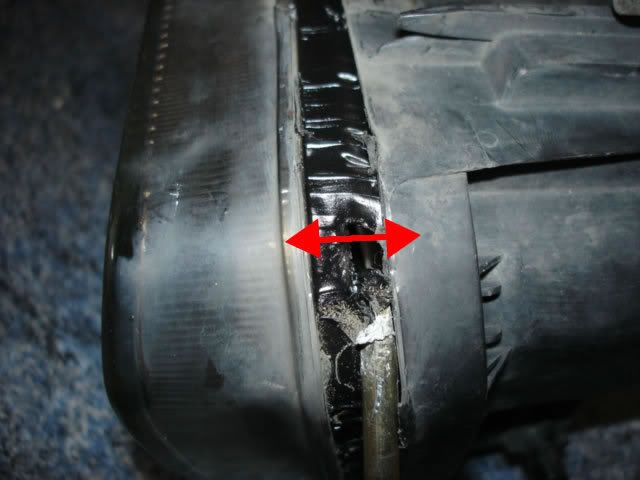
7) After 50 mins, remove the unit and GENTLY pry apart the lens from the body with a large flat blade. Care must be taken not to chip or crack the lens and DO NOT use a lot of force! Gentle pressure will work as long as the sealant is warm/soft enough! The sealent is VERY stringy and VERY sticky, so be careful not to get any on the inner part of the lamp or on your clothes (or the kitchen for that matter!
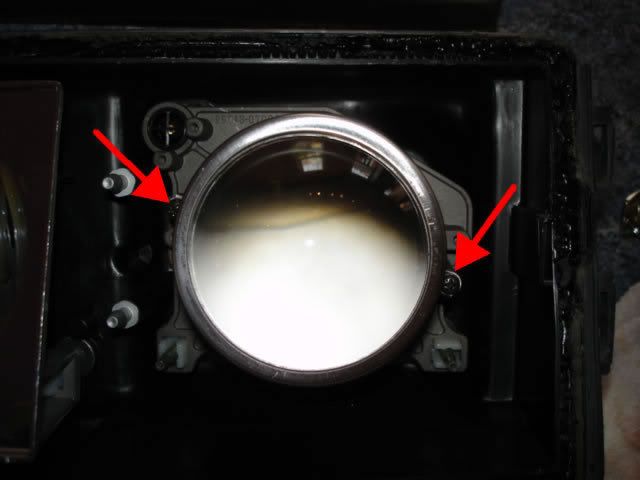
8) You now need to remove this cover
9) It just pulls off, but is VERY tight because the thing is held on by these two lugs inside - a leap of faith is needed to get it off because you can't see the lugs, and have to pull it off without knowing if something will break! (It won't
10) This shows the unit with the lens and the inner cover removed
11) Remove these two screws either side of the projector lens, then remove the chrome surround/clamp (just lifts off)
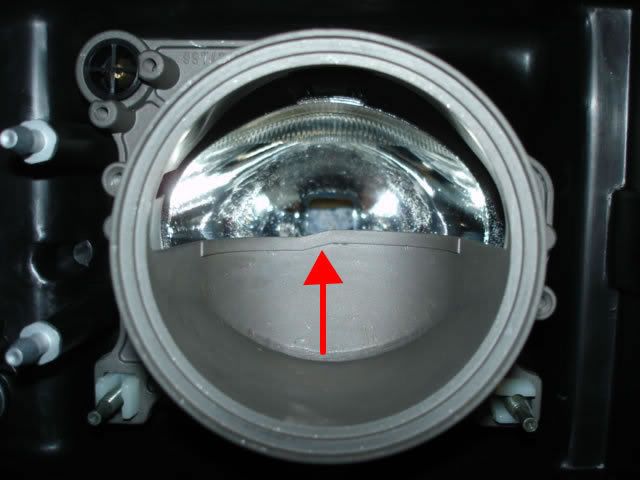
12) Lift out the lens itself (once the chrome surround is unscrewed and removed, this simply lifts off!)

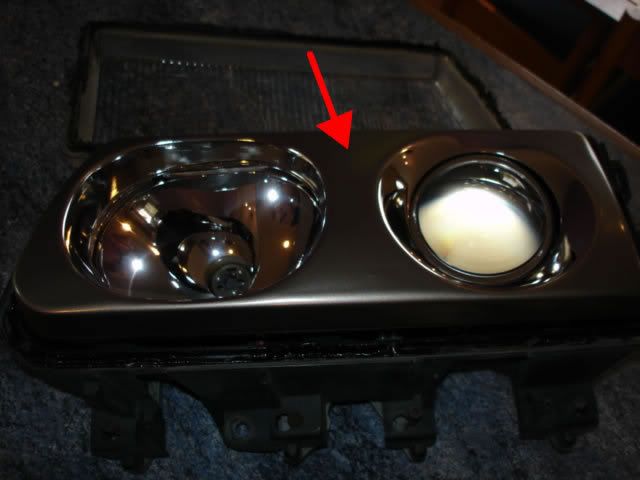
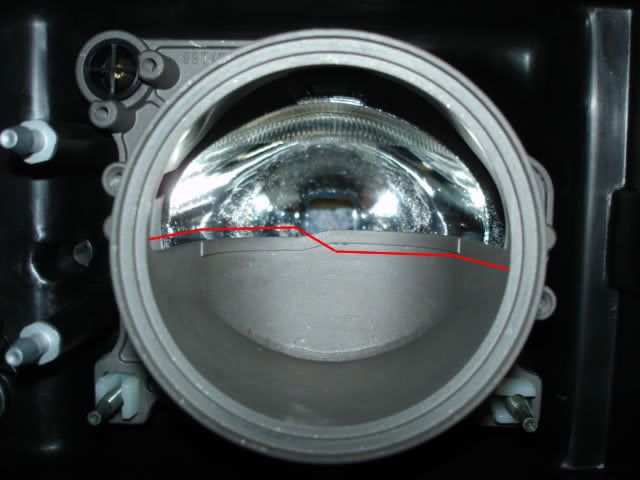
13) This is where the probelm lies: The beam pattern is actually 'cast' into the lens housing!! :( (see the dip where the arrow is - this is what deflects the beam!)
This means that there is no way to adjust the beam pattern like you can in the BMW or the Barchetta! It's a shame because the projector lamp was designed by Bosch to avoid the need for LHD & RHD lenses! It was designed from the start to have a 'moveable' beam pattern plate so that ONE unit could be produced for both markets! Obviously Mitsubishi decided to produce an integral beam pattern so that it is fixed and non-adjustable!
Sorry guys - I was really hoping this would be a simple fix for you!!
THERE IS A POSSIBILITY FOR YOU THOUGH????
If I was living in Canada, I would certainly do the following to my lamps to make them prefectly suited to Canadian roads and required beam patterns (as you probably know by now, I'm not afraid to try things out! :lol: )
I'd remove the lens housing (the grey cast thing) and re-profile the beam pattern by cutting down the metal on the right and adding some to the left (heat resilient resin would do the trick!) to recreate the correct shape in 'reverse'
Make the housing the exact opposite of what is already threre and you have the perfect beam pattern for Canada! :D :D :D :D :D
Simple really!! :lol: :lol:
Once again guys, sorry that the outcome didn't quite work out the way I was expecting, but I did try for you - and there is a possible way to resolve it IF you are brave enough! (I would be if I needed to change the beam!
Now I've just got to put it all back together and get in on the motor in time to go away tomorrow! :lol: :lol:
Regards,
Bruce.