My inclinometer died, so I pondered what to do with the space. Since the Delica just begs for a voltmeter, especially given the events I do where draining the battery is an issue, I figured I'd put a voltmeter in the empty space. Then I had to decide between a analogue GM one, or a digital Colluck one I had. I picked the digital. (I had both laying around in my pile of miscellaneous parts.)
The Colluck PM128E digital panel display can be set up as an AC or DC voltmeter or ammeter, and variable range. The DC voltmeter configuration can be 0-200mV all the way to 0-500V; I picked the 0 to 20 VDC range with 2 decimal places as the most useful. The only drag is that it needs 5 VDC (or 9 VDC) to run, so I had to add a 3-tab regulator.
1) First thing I had to do was cover the angle markings on the front of the pod. I used the black vinyl cover off a 3-ring binder, cut it slightly larger than the circular opening, cut the opening for the voltmeter, then slipped in between the pod and faceplate of the inclinometer.
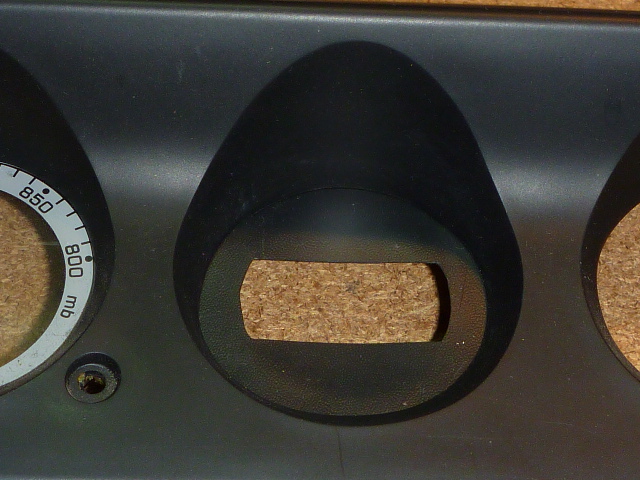
- Pod face with vinyl insert to cover inclinometer markings.
- 1 pod faceplate.JPG (166.89 KiB) Viewed 5428 times
2) I added the 5V 3-tab regulator to the voltmeter's circuit board. I used a pin connector from computer parts, which just happen to slide perfectly over the pins, so that it can be easily disassembled. A 3-tab regulator (about 75 cents at electronics supply stores) takes 10-35 volts as input and outputs a stable 5 volts DC, which the voltmeter needs. Not my most perfect wiring and soldering job, but no one will ever see it -- oops except everyone on the forum!
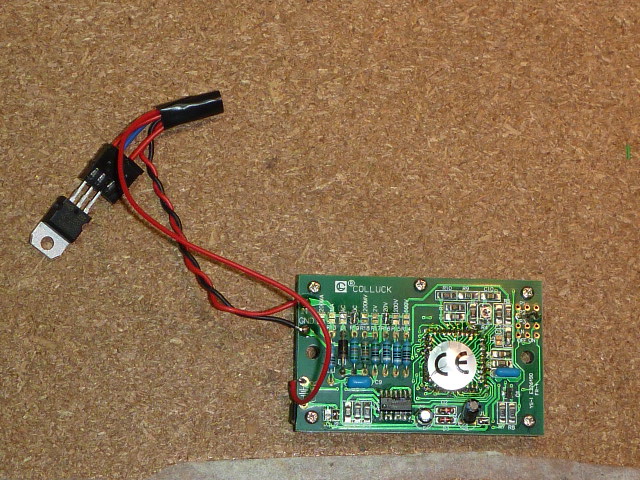
- 3-tab regulator connected to the panel display
- 2 voltage regulator.JPG (170.5 KiB) Viewed 5428 times
3) Next I needed vehicle voltage. I posted a question a week or two ago about the wiring of the pod, but no one knew what wires do what. Since the thermometer and the dash lighting get power, I looked for the accessory-live connections. I took voltmeter to the dash side of the connector and found some pins that showed 12 V on accessory. But various combinations were possible so I partially disassembled the thermometer module, and had a closer look.
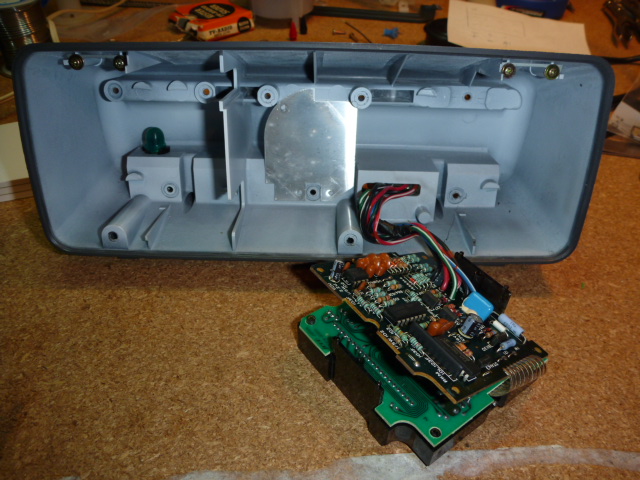
- Delica's thermometer module, partially disassembled.
- 3 thermometer.JPG (161.28 KiB) Viewed 5428 times
4) A closer look at the circuit board of the Delica's thermometer revealed some very useful markings.

- Delica's thermometer circuit board, with labels
- 4 therm board.JPG (170.92 KiB) Viewed 5428 times
Note the left-most wire (blue) is marked IG (which I take to be "ignition"), and the connection beside it (black/green wire) is labeled G (which I take to be ground). This matches one of the combinations I found to show voltage on the connector. When looking into the connector coming out of the dash, the bottom left pin is what goes to IG and the one beside it goes to the G on the board. I figure the IG should really be ACC, since it has power on accessory, not just on ignition. And that suited my needs perfectly.
5 & 6) Turning the board over reveals the solder pads that obviously didn't have the flux removed at the factory.
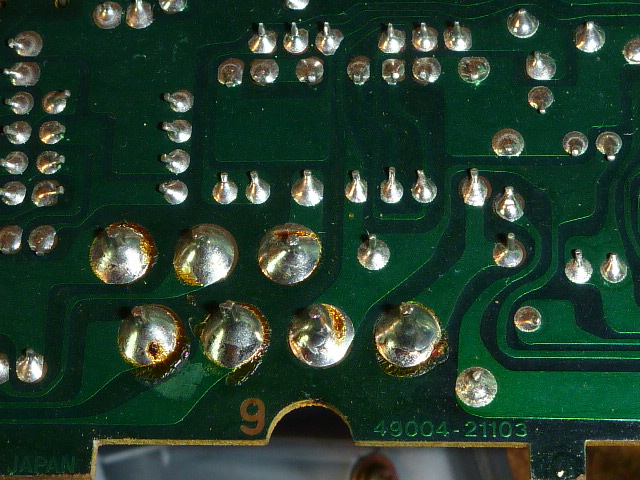
- Delica's thermometer circuit board, the other side
- 5 therm board.JPG (164.85 KiB) Viewed 5428 times
I then soldered the two sense wires for the voltmeter onto the appropriate pads.
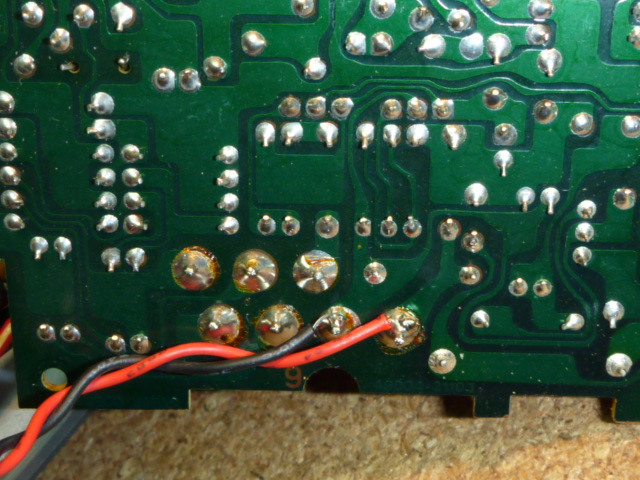
- Delica's thermometer circuit board, the other side, with voltmeter's sense wires attached.
- 6 therm soldered.JPG (167.62 KiB) Viewed 5428 times
7) The other end of the two wires I soldered on to the circuit board are soldered onto the 3-tab regulator. I then reassembled the thermometer. A 3-tab regulator should have a heat sink. Fortunately, the Delica has a thin sheet of aluminum in the pod behind the inclinometer that makes a perfect place to mount the regulator, and provide a heat sink at the same time. Bonus!
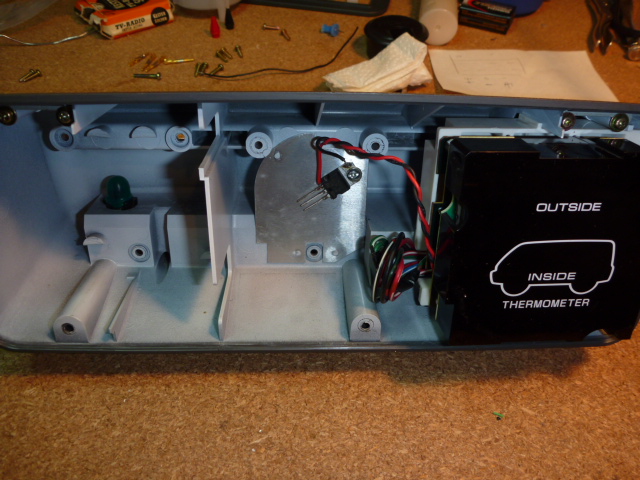
- Delica's thermometer reinstalled, with 3-tab regulator.
- 7 therm installed.JPG (165.6 KiB) Viewed 5428 times
[Continued in next post, due to the forum's limit of 7 attachments per post]

 "I could be just around the corner from heaven, or a mile from hell." -- Jackson Browne, "The road and the sky".