Righto- workshop renovation complete, on with the Lokka install!
Previously I'd run into issues with the clearances- without a shim kit it was going to be irritating to get the clearances right. But now I have a shim kit...
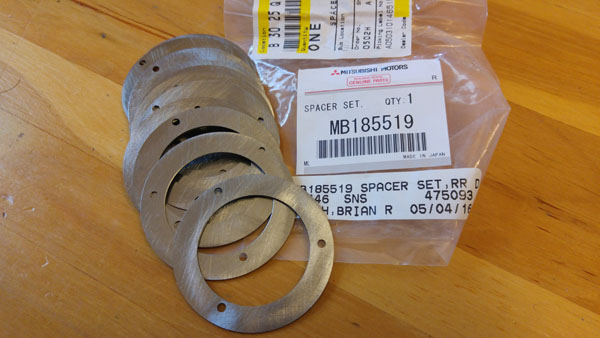
- spacerSet.JPG (64.59 KiB) Viewed 4363 times
Part number MB185519. The shims in my kit are 0.80mm, 0.86, 0.90, 0.93, 1.00, 1.06, 1.10, 1.13, 1.16, 1.22, 1.27, 1.33. I'm going to have to use the two thinnest ones- I guess the kit is for bringing a worn differential back into spec.
Now, where were we...
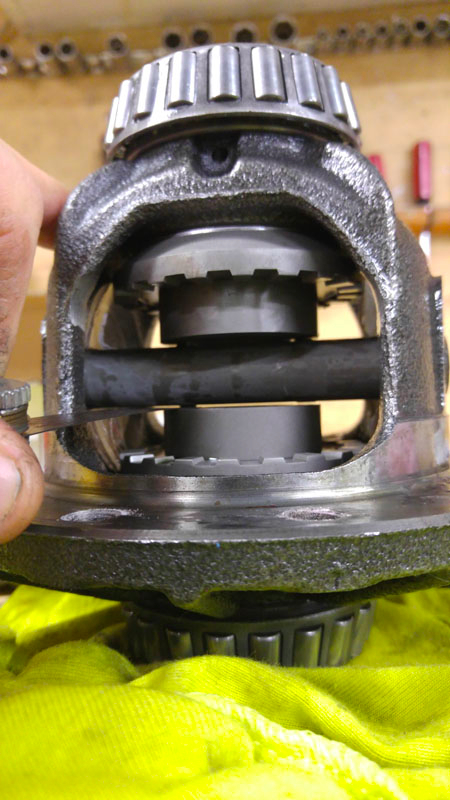
Install the side gears and spacers with new shims, then the cross shaft. Check the clearance between the cross shaft and the spacer- it should be 0.006 - 0.020", and ideally even on each side. (Mine are 0.012"). Lokka say not to worry too much about these clearances, the important one is the inter-cam clearance which we measure later.
- CheckClearnaces.jpg (344.32 KiB) Viewed 4363 times
Now install the pins into the open slots in the cam gears, with the nipple on the pin downwards. The nipple will sit inside the spring when we get to those.
- InstallPins.JPG (315.26 KiB) Viewed 4363 times
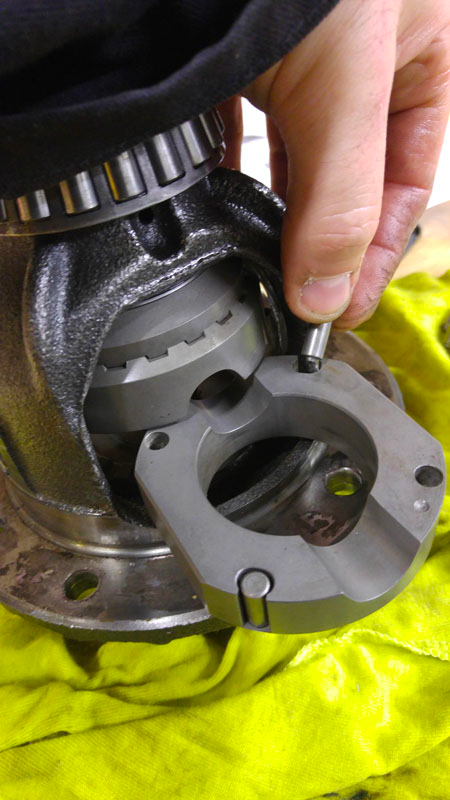
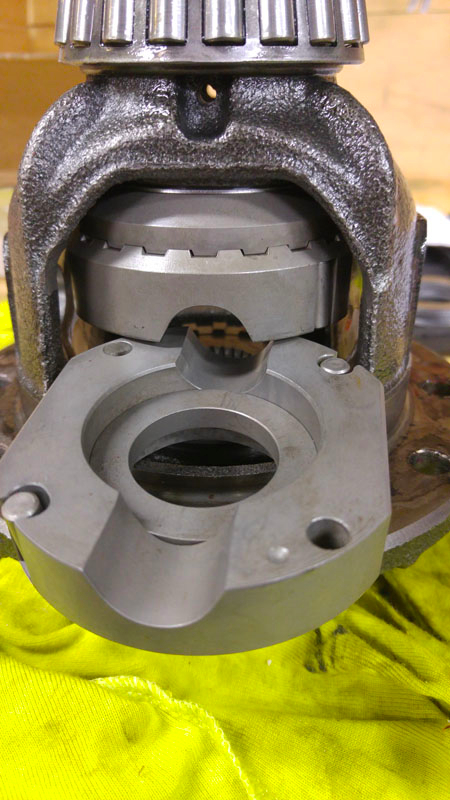
Install the cams into the diff cage. The upper one goes in first, then slide the second one in with the spacer inside.
- InstallCam.JPG (346.43 KiB) Viewed 4363 times
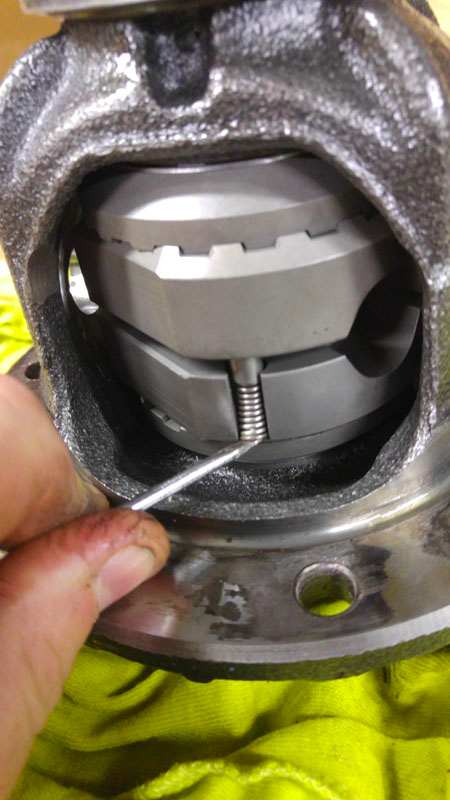
Align the cams, then push the pins across into the opposing hole.

- PushPins.jpg (331.64 KiB) Viewed 4363 times
Wear safety glasses. Install the springs. Be glad you're wearing safety glasses as the last spring bounces off where your eyeball would be. Spend half an hour looking for the spring. Find it lodged in your beard. Install the last spring.
- InstallSprings.jpg (289.63 KiB) Viewed 4363 times
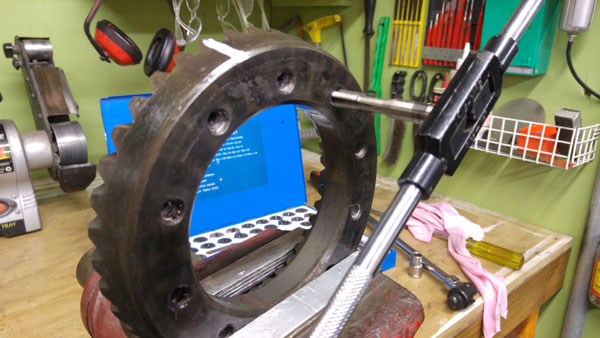
Push the cross shaft into place, and check the clearance between cams. It should be between 0.145 - 0.165". Nailed it.
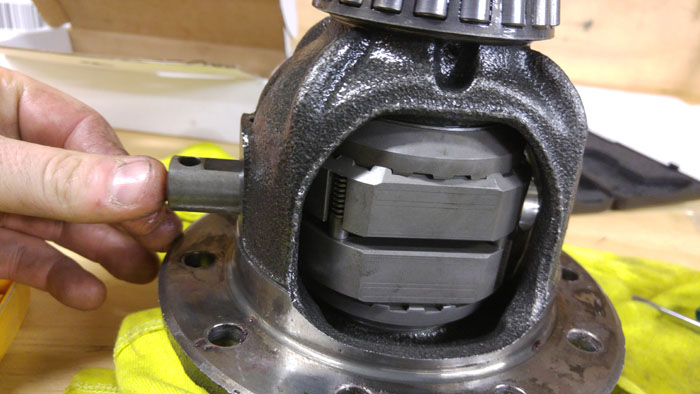
- CrossShaft.JPG (82.89 KiB) Viewed 4363 times
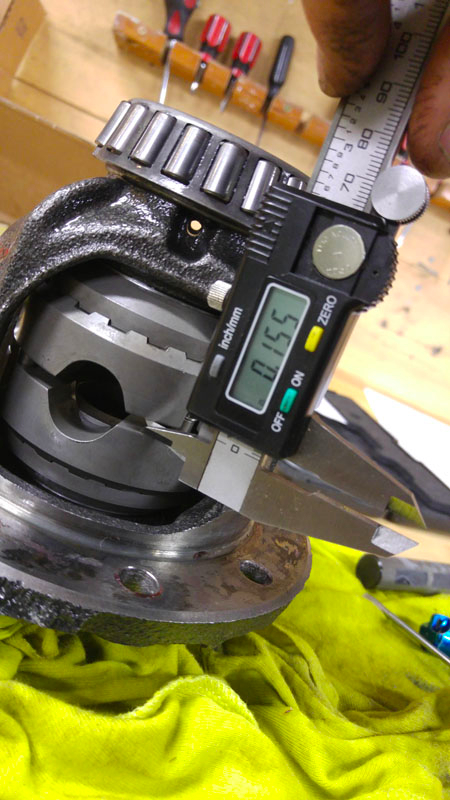
- CheckClearnace.JPG (351.77 KiB) Viewed 4363 times
Install the locking pin and peen the edge of the hole so it can't come out
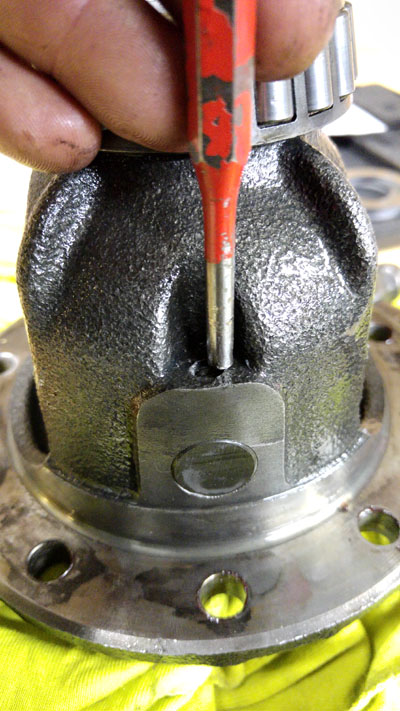
- PeenEdges.JPG (106.64 KiB) Viewed 4363 times
Clean up the ring gear bolt holes and bolts (M10x1.25 tap), and install with thread locking compound (usually red).
- CleanThreads.JPG (84.45 KiB) Viewed 4363 times
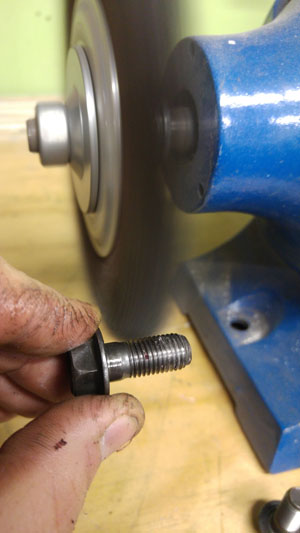
- CleanBolts.JPG (46.71 KiB) Viewed 4363 times
Reinstall the differential into the housing, making sure you put the spacers and bearing caps back the way they came out.
I prefer to use a paper gasket and a small amount of sealant, but some people just use form-a-gasket. Those people are heathens and I'm totally judging them.
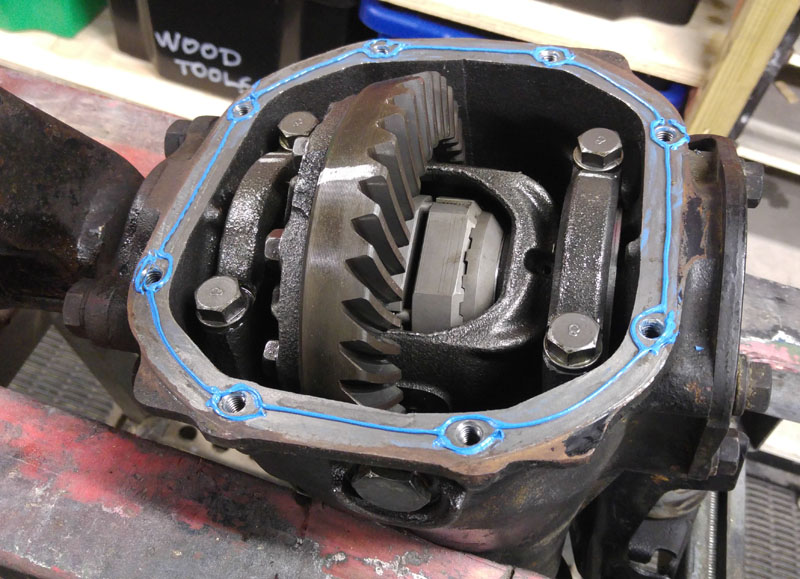
- HousingSealant.JPG (145.83 KiB) Viewed 4363 times

- CoverSealant.jpg (109.73 KiB) Viewed 4363 times

- Finished.jpg (104.75 KiB) Viewed 4363 times
Reinstall and test the Lokka as detailed in the instructions. I had to turn the driveshaft manually to engage the auto hubs, but once they were locked it clicked gently like it should.
Nothing says "poor workmanship" more than wrinkles in the duct tape.