Step 1 - Vacuum Pump:
The electric vacuum pump can be found on many early 80 General Motors products. Unfortunately they are no longer available new. I was unable to locate one at the wreckers around here so I decided to buy a new pump from Stainless Steel Brake Company as follows:
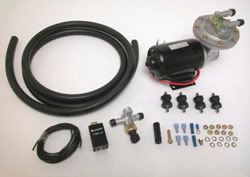
I choose an electric pump as there is no space under the hood to mount a belt driven pump. Belt driven pumps are much cheaper - I have a spare now, but there isn't space.
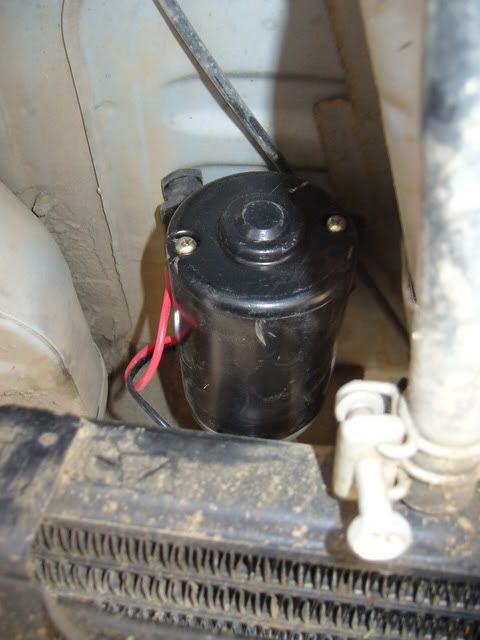
I mounted the pump under the drivers footwell above the little radiator. It is quite dry and mud free up there:
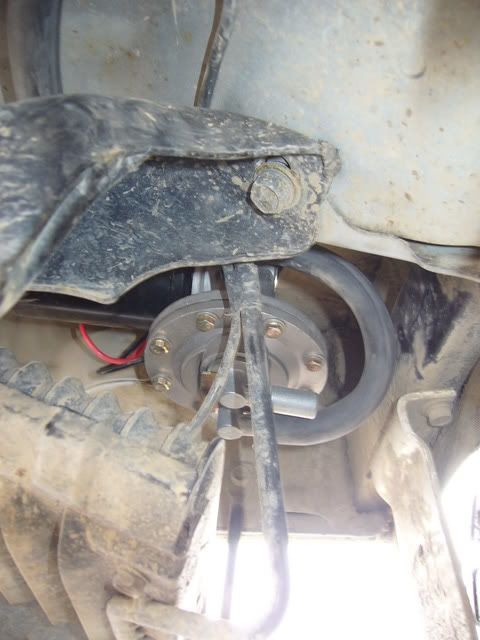
The kit include lots tubing and wire to go from there. I did need a bit more wire for the relay though. There is a vacuum switch which turns the pump on and off at set vacuum levels. It is mounted in the tube from the pump before it goes into the brakes. Here under the drivers seat:

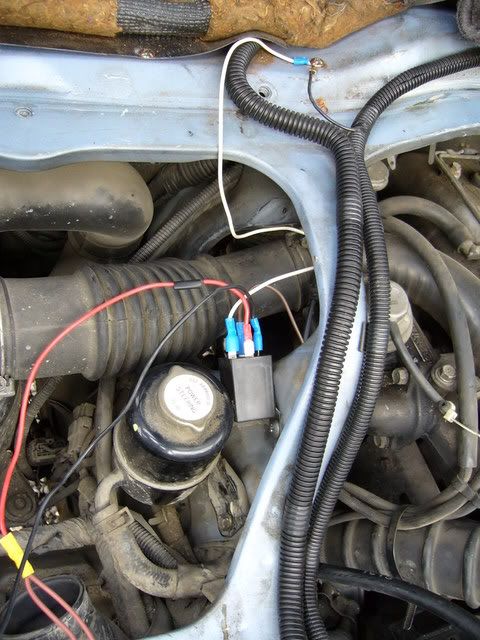
The relay is in the access panel behind the drivers seat:
There is T in the line after the switch to split the vacuum to the brakes and the little line to various other switches and whatever. I have a small vacuum resevoir out of my Range Rover on there now, but am going to find a bigger resevoir. This will reduce the number of times the pump cycles.
2. Alternator
The alternator is a standard 100 amp Delco style internally regulated one. I had a tach post put on as well. I used the double pulley's from the factory alternator on the new one - this maintained the same spacing and diameter to keep the tach accurate. The mount had to be fabbed up but was very simple. The top tensioner bolt was able to be retained. Here are some pics of the alternator in place:
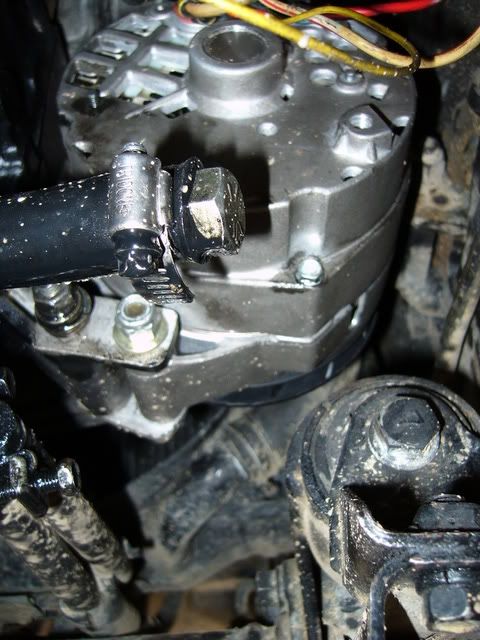

oops - I see a loose wire to fix
Wiring the alternator is simple. There are four posts - 3 spade and 1 threaded. Post 1 as labelled goes to the dash light (red and white factory loom), but will be on a voltmeter shortly. Post 2 goes back to the threaded post (red wire added). Post 3 is to the tachometer (blue wire in factory loom). The threaded post to the batteries.
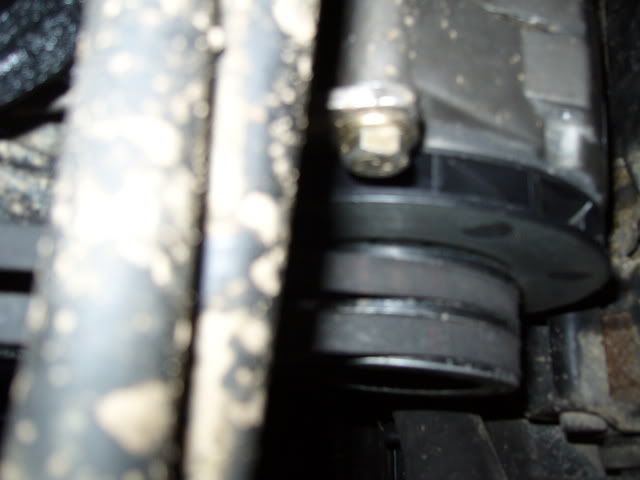
Removed and plugged the old vacuum pumps oil feeds. There is a banjo fitting off the oil filter mount for one - an appropriate bolt was put in the hole - being careful to tighten a little then test for leakage - didn't want to strip out the threads. A drain also goes directly into the engine sump. This easily blocked with a bolt and hose clamp.
3. Testing.
The alternator works good, all the vacuum devices work the same, and I don't have to monitor my power usage anymore. Only problem is the dash light stays on (it also causes the drain light and A/T Temp light to stay on). I will wire in the voltmeter and skip the light.
4. Cost
Electric Vacuum Pump - SSBC $375
Alternator (100 amp) - $135
Various fittings and connectors - $10
Three new teeth - $3500
Total - $4020 - only $520 dollars without dental work.
Replacement Mitsubishi Alternator
Special Order - about $600
The cost can be reduced if you are able to find a used electric vacuum pump in a wreckers - they are on E- Bay occasionally but usually cost about $175 I'd rather have new and warrantied for that price.
5. Time.
The vacuum pump took 6 hours to install including trying to figure out where to put it. Removing the old alternator and pump should be1 hour but we had a terrible time trying to get a bolt to thread into the hole for the oil feed. It would probably be easier to block out the other end of the fitting and let it dangle. Installing the new alternator 1 hour. Checking for leaks and checking etc 1 hour.
6. Things I learned.
There is very little space in the engine compartment and under the chassis for mounting additional things. I wanted a belt driven vacuum pump but there is nowhere to put it. Watch out when pulling the alternator it is heavy and gets caught on things. As I was pulling it across me it hit something and swung down and tapped my front teeth breaking three.
People considering mods suchas intercoolers, bigger tturbos, etc should look carefully for space to mount these things before investing in them.
Hope this was useful.
James

 Call me BCDelica-less