Replaced the timing belt, upper and lower tensioners, waterpump, and thermostat this past weekend. Not overly complicated, but time consuming. I have a few suggestions for anyone attempting this job.
1. Get a helper...I had one and it was invaluable. There were many times when I needed a third and fourth hand.
2. After removing the fan remove the rad. It gives you more space to work, is easy to get out and makes a big difference when attacking the crank bolt.
3. Use a paint marker to make your own reference marks in addition to those on the block (it gave me more confidence in case something moved).
4. Take a digital photo of the face of the block once the covers are off. It will help you when reassembling...especially the position of the tensioner springs.
5. Take note of the position of the bolts in the waterpump....they are different lengths and must go in the the same holes upon reassembly.
Air tools were a big help to me especially when removing the crank bolt, but are not necessary. No one should be afraid to tackle this job as it is just time consuming (8hrs). Got my parts through Sean at Zenautoworks for a good price and fast delivery. I tried to upload some photos, but couldn't do it. If anyone wants to see the face of the block before opening it up just send me an email and I will send them to you.
Phil
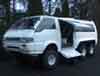
Timing Belt replaced
-
skippyalbright
- Posts: 10
- Joined: Wed Feb 06, 2008 10:56 pm
- Member's Photo Album: http://www.delica.ca/Photos/
- Vehicle: 1992 Exceed
Timing Belt replaced
- Attachments
-
- IMG_1172.jpg (53.83 KiB) Viewed 7973 times
-
- IMG_1171.jpg (47.98 KiB) Viewed 7973 times
-
- IMG_1166.jpg (49.59 KiB) Viewed 7972 times
-
- IMG_1170.jpg (44.69 KiB) Viewed 7972 times
-
skippyalbright
- Posts: 10
- Joined: Wed Feb 06, 2008 10:56 pm
- Member's Photo Album: http://www.delica.ca/Photos/
- Vehicle: 1992 Exceed
Re: Timing Belt replaced
I guess the photos did work.
-
snelson

- Posts: 406
- Joined: Sat Jan 26, 2008 6:29 pm
- Member's Photo Album: http://www.delica.ca/Photos/
- Vehicle: 92 Delica Exceed
- Location: Banff
- Location: Banff, Alberta
Re: Timing Belt replaced
That's awesome man-great job. So any special tools needed? Did you have a service manual to follow?
-
skippyalbright
- Posts: 10
- Joined: Wed Feb 06, 2008 10:56 pm
- Member's Photo Album: http://www.delica.ca/Photos/
- Vehicle: 1992 Exceed
Re: Timing Belt replaced
No real special tools although air tools were helpful. That crank bolt was a B***h. By removing the rad I had enough space to get on it with my impact wrench. Then it came off no problem. I'm in Cow Town and used to live out Banff way so give me an email if you are going to diy.
-
jessef

- Posts: 6459
- Joined: Tue Feb 26, 2008 1:27 pm
- Vehicle: JDM flavour of the month
- Location: Vancouver
- Location: Vancouver, BC
Re: Timing Belt replaced
Just make sure (anyone doing this job) to examine your crank pulley to see if there is any wear from the key.
And crank down that bolt 1st @ 90 ft lbs then @ 120 ft lbs. Otherwise you may end up with a engine block as a large paper weight.
Good job to tackle.
And crank down that bolt 1st @ 90 ft lbs then @ 120 ft lbs. Otherwise you may end up with a engine block as a large paper weight.
Good job to tackle.
-
Green1
- Posts: 3257
- Joined: Wed Jul 19, 2006 9:18 pm
- Member's Photo Album: http://www.delica.ca/Photos/
- Vehicle: 1994 L400 Royal Exceed PF8W
- Location: Calgary Alberta Canada
- Contact:
Re: Timing Belt replaced
disclaimer: I have never tackled this job myself
I gather that it's not overly difficult, but it IS finicky, if your timing is out, even a small amount, you can do serious damage to the engine (one of my head replacements came about that way, and that was only a very minor mis-adjustment!)
I gather that it's not overly difficult, but it IS finicky, if your timing is out, even a small amount, you can do serious damage to the engine (one of my head replacements came about that way, and that was only a very minor mis-adjustment!)
-
snelson
- Posts: 406
- Joined: Sat Jan 26, 2008 6:29 pm
- Member's Photo Album: http://www.delica.ca/Photos/
- Vehicle: 92 Delica Exceed
- Location: Banff
- Location: Banff, Alberta
Re: Timing Belt replaced
I can't imagine why it would be any different/harder than any other timing belt replacement
A little trickier to access, but other than that - rotate to tdc, make your marks, remove the parts your replacing and put everything back how you found it.
My only concern would be having a manual with the proper sequence of steps and torque specs.
A little trickier to access, but other than that - rotate to tdc, make your marks, remove the parts your replacing and put everything back how you found it.
My only concern would be having a manual with the proper sequence of steps and torque specs.
-
Green1
- Posts: 3257
- Joined: Wed Jul 19, 2006 9:18 pm
- Member's Photo Album: http://www.delica.ca/Photos/
- Vehicle: 1994 L400 Royal Exceed PF8W
- Location: Calgary Alberta Canada
- Contact:
Re: Timing Belt replaced
I didn't say it would be difficult. And unlike some people I've seen post on this site I won't even say not to do it yourself. I'm just saying be careful, don't rush, and make sure you don't screw up your timing, these engines don't take kindly to that sort of thing.
-
Blackberry
- Posts: 99
- Joined: Fri Feb 29, 2008 1:45 pm
- Member's Photo Album: http://www.delica.ca/Photos/
- Vehicle: '92 Exceed P35W
- Location: Victoria
Re: Timing Belt replaced
Yes, definitely. Also, after fitting the replacement belts & tensioners and triple-checking all the timing marks align, before replacing the covers and accessory belts and rad, etc... put the crank pulley on loosely (meaning don't torque the bolt to the full 130ft/lbs because you'll need to remove it again), connect your battery and try firing it up for just a moment (5-10 seconds) to make sure it runs/that you've got the belts on correctly and aren't out a tooth. Make sure everything (eg. power-steering pump) is clear of the moving parts before starting.skippyalbright wrote: 2. After removing the fan remove the rad. It gives you more space to work, is easy to get out and makes a big difference when attacking the crank bolt.
Yes, they are handy, but my air gun wouldn't budge the crank pulley bolt so I used this somewhat scary technique http://www.delica.ca/forum/camshaft-nut ... nk+breaker ...and it worked. Make sure to disconnect your glow-plug lead before attempting...wouldn't want it to fire-up. After using this technique I discovered there is an inspection plate on my manual trans bell-housing that, when removed, provided a spot to wedge a screw-driver against the ring-gear when it came time to, at least, tightening the crank bolt.skippyalbright wrote: Air tools were a big help to me especially when removing the crank bolt, but are not necessary.
-
Golf Cart

- Posts: 857
- Joined: Tue Jul 15, 2008 10:57 pm
- Member's Photo Album: http://www.delica.ca/Photos/
- Vehicle: 1992 Exceed
- Location: Maple Ridge
Re: Timing Belt replaced
Just an observation,
I would be more inclined to rotate the engine by hand at least 2 revolutions prior to flashing it up. This will achieve 2 things. 2 revolutions back to TDC will determine if all the marks line up, AND will tell you the pistons are not making contact with the valves. If you crank the engine by hand and it stops up, its easier to reverse rotation and re-check your marks.
The other thing was to diconnect the IP fuel solenoid in addition to disconnecting glow plug lead. That way you are doubley sure it wont fire up while cranking.
Any real mechanics may want to chime in at this point - This is just my backyard, wrench wannabe, if it jams force it experience.
By the time you realize that my signature has no real message or life altering words of wisdom, you're too far into it to stop reading until you are finished
-
Green1
- Posts: 3257
- Joined: Wed Jul 19, 2006 9:18 pm
- Member's Photo Album: http://www.delica.ca/Photos/
- Vehicle: 1994 L400 Royal Exceed PF8W
- Location: Calgary Alberta Canada
- Contact:
Re: Timing Belt replaced
let me emphasize this part again... DEFINITELY turn it over by hand at least 2 revolutions prior to starting the engine. Had my first head replacement done this I never would have needed the second one...I would be more inclined to rotate the engine by hand at least 2 revolutions prior to flashing it up. This will achieve 2 things. 2 revolutions back to TDC will determine if all the marks line up, AND will tell you the pistons are not making contact with the valves. If you crank the engine by hand and it stops up, its easier to reverse rotation and re-check your marks.
-
Super Exceeded
- Posts: 620
- Joined: Mon Aug 16, 2010 11:09 am
- Member's Photo Album: http://www.delica.ca/Photos/
- Vehicle: 1993 L300S
- Location: South Surrey
Re: Timing Belt replaced
OK, Just because I don't know, but do.
I am about to put the belts on and get this damb thing ready to fire up. I understand the TD Center mark, but why the other 10 degree mark? What is this for?
I am about to put the belts on and get this damb thing ready to fire up. I understand the TD Center mark, but why the other 10 degree mark? What is this for?
-
Modsqwad
- Posts: 233
- Joined: Fri Jan 02, 2009 11:39 am
- Member's Photo Album: http://www.delica.ca/Photos/
- Vehicle: 91 Deli & KLR 650
- Location: Victoria BC & Sayulita Mexico
Re: Timing Belt replaced
Thats probably an advanced firing indicator for setting up injection pump timing.