Hi:
Can anybody suggest the best method for removing rust from a white bushbar, the best paint
to use for repainting, and the best way to avoid the white overspray I've seen on some Delis?
Thanks,
Sandra
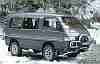
Bushbar rust and repainting
-
coaxial
Re: Bushbar rust and repainting
I just re-painted mine, and it looks good, not sure about durability yet though as it was just done. I'll see in a year or two I guess :)
First I washed the bumper, then went over it with a wire brush, getting all the excess rust off and scuffing the paint as much as I could. Then used some coarse sandpaper to get rid of any glossy paint left that I could see. Extra sanding to the areas that were rusty. Sprayed some rust converter on the parts that had rust (not sure if this was needed). Washed again.
next day:
Covered the front of the van with a large plastic dropcloth and tape. Painted the bumper with Tremclad automotive primer (spray can)
next 2 days:
painted the bumper with tremclad "real orange", 3 coats. Once that was dry I sanded and painted black trim parts with tremclad black rust paint (can and brush). This included the fog light metal holders, mirror bars, and any other black metal showing rust at all.
Seems great so far, looks good for a do-it-yourself rattlecan paintjob. You can actually get professional looking results with enough wet sanding and waxing and maybe clear topcoats but I'm too lazy for that.
This isn't a great photo and was taken before I painted the black parts, but shows you the colour. (yes I was going for pylon orange on purpose )
)

While I was sanding the bumper I became curious if I could make the big plastic part more black with sanding it, and yes, you can. I sanded the whole thing with fine sandpaper and treated it with "back to black", it looks pretty good. Saves me getting around to treating it with a heat gun.
I'll try and take a better photo of the finished job tonight.
First I washed the bumper, then went over it with a wire brush, getting all the excess rust off and scuffing the paint as much as I could. Then used some coarse sandpaper to get rid of any glossy paint left that I could see. Extra sanding to the areas that were rusty. Sprayed some rust converter on the parts that had rust (not sure if this was needed). Washed again.
next day:
Covered the front of the van with a large plastic dropcloth and tape. Painted the bumper with Tremclad automotive primer (spray can)
next 2 days:
painted the bumper with tremclad "real orange", 3 coats. Once that was dry I sanded and painted black trim parts with tremclad black rust paint (can and brush). This included the fog light metal holders, mirror bars, and any other black metal showing rust at all.
Seems great so far, looks good for a do-it-yourself rattlecan paintjob. You can actually get professional looking results with enough wet sanding and waxing and maybe clear topcoats but I'm too lazy for that.
This isn't a great photo and was taken before I painted the black parts, but shows you the colour. (yes I was going for pylon orange on purpose
While I was sanding the bumper I became curious if I could make the big plastic part more black with sanding it, and yes, you can. I sanded the whole thing with fine sandpaper and treated it with "back to black", it looks pretty good. Saves me getting around to treating it with a heat gun.
I'll try and take a better photo of the finished job tonight.
-
TardisDeli
- Posts: 1425
- Joined: Tue Sep 18, 2007 10:57 pm
- Member's Photo Album: http://www.delica.ca/Photos/
- Vehicle: 1991 L300. 1997 L300.
- Location: Burnaby
- Location: Burnaby, Gaglardi freeway exit
- Contact:
Re: Bushbar rust and repainting
Hi Louise & Sandra, and Delhi the Deli,
As Coaxial described the L300 so well, I will just add that we unbolted ours completely to make it easier to work on. I laid it atop a couple of sacrificial milk crates so no dirt & dust from the ground, and easier to reach than bending. Washed it with water and soap, rinsed well, let it dry. Cheap Sandpaper sheets cut in approx 5 inch pieces, so I could curl it round the bars and rub with my hand wrapped over the sandpaper, then got the corner bits with a bit more fuss, just want to scuff all the surfaces to let paint adhere. Then vacuumed it, and hosed it with no soap, and let it dry. Then I used dollar store foam paint brush dipped into a pot of shiny "aluminum" colour look paint (expensive), and tried not to paint too heavily so it wouldnt drip and leave ugly paint runs. 2 thin coats better than 1 thick. My brushed metal look is more reflective for night time drivers, and goes better with the colour of my black and silver van than the ugly white that was there. I do like Coaxial's idea of a metal rust clad paint, that would be more durable and does chemically bond with rust to stop it.
What colour are you planning? I usually don't like the black, because it blends in too much, and the first thing most of us notice is the "Bambi Bars" then we watch to see if it is a Delica, then we start waggling our wiper stalk because we're trying to find the turn signal stalk, then I open the window and wave, so ... need to see the bush bars from a long ways off to have tome to do all my signalling.
But on your delhi black might look good to contrast with the white, can't remember exactly your colour scheme. Or stencil a few elephants walking along the bars, with the deli name on the bars. Hmmm ... If only your login ID included a photo of Delhi the Deli for us all to admire and offer colour suggestions ....
Christine.
-
dfnder

- Posts: 526
- Joined: Wed Mar 05, 2008 9:36 pm
- Member's Photo Album: http://www.delica.ca/Photos/
- Vehicle: '91 Exceed
- Location: Squamish
Re: Bushbar rust and repainting
I just painted by bushbars gloss black this past week. I also opted for taking them completely off as I wanted to attack any rust that may have been present under the plastic cowling. I had some spot rust on some of the exposed weld joints but otherwise my bars were pretty good. I used this to help me in my work http://www.delica.ca/forum/prepping-for-paint-3114.html
I tried two brands of paint from Canadian tire, Tremclad rust paint and Rust check. I liked how the tremclad went on but it took forever to cure. The Rustcheck went on a little heavy so you need to keep your strokes moving and be careful not to linger or it will run but it cured way way faster. Also the second can of rustcheck the spray nozzle caused occasional small blobs of paint to be deposited. I was pretty diligent about cleaning out the nozzles (hold upside down and spray til goes clear in color) so I just swapped the nozzle with the first can and it worked awesome. Being a little anal about painting I didn't feel good about taping and spraying knowing that areas wouldn't get the proper amount of paint, also I was changing the color to black and so it would need a good coat to look good.
As for the black plastic, I would definately use the heat gun, it looks so awesome afterwards and is real easy. Make sure you take a scrub brush to any area that may have some dirt in the minute texture on these. Any dirt left on will likely be welded into place after the heat gun treatment.
One thing I would suggest, I had a handful of ziplock baggies on hand and a few stickies to write down where specific nuts, screws came from. Also I took a few pictures that helped me on my way as to how to re-attach my aftermarket horn. One thing I failed to do was to make a note of how the little semi-circle pieces are orientated that sort of act like washers between the bars and cowling. Heading down the road to look at a Delica which is for sale to get it right.
Good luck!!!
-
delica 304
- Posts: 322
- Joined: Sun Dec 23, 2007 7:19 am
- Member's Photo Album: http://www.delica.ca/Photos/
- Vehicle: 1992 delica GLX
- Location: Lower left hand of Canada, surrounded by a moat!
Re: Bushbar rust and repainting
Like most people, I just pulled my bush bars/ rad guards/ bumper/ steps off.
Then, using a wire wheel, I stripped the paint off and scoured off some of the rust (I needed to keep some corrosion for the next step)
I then liberally applied Plasti-Kote's "Rust Not" rust converter. It comes in a black bottle, is organic, greenish in color, and smells like poo! It is, however, very effective at killing rust!
I then primered with Tremclad rust inhibiting primer, and then
I repainted the lot using Tremclad's Hammered finish spray laquer. The dark gray looks very good on the bumpers.
In the end, I globbed on a bit too much rust converter, and you can see some resulting lumps under the paint. So far, the bumpers haven't shown any signs or rusting, except where the paint has been scraped off. Which is really impressive in the case of the bush bar, as I was painting in between rain showers in March!
As for the black plastic, I used trim paint, and it worked like a charm! I've heard that the heat gun method fades quickly and look splotchy as it fades
-
Meanman
- Posts: 342
- Joined: Sun Dec 07, 2008 5:27 pm
- Member's Photo Album: http://www.delica.ca/Photos/
- Vehicle: 1990 Exceed Crystal lite
- Location: Maple Ridge
Re: Bushbar rust and repainting
Haven't yet got around to painting my bars......BUT..... I have found that when painting metal, KRYLON FUSION, paints seem to adhere like no other. They come in all sorts of colours and do fairly well to protect from rust although they don't react like rustoleum or tremclad to rust.
YOUTH JUICE YOUTH JUICE RESTOR
The Goodness of 7 Pounds of Whole Berries+ 3 Sea Vegetables in Every Bottle
http://www.jhallen.youthjuice.com
The Goodness of 7 Pounds of Whole Berries+ 3 Sea Vegetables in Every Bottle
http://www.jhallen.youthjuice.com
-
flyfishn
- Posts: 279
- Joined: Sun Nov 23, 2008 8:27 pm
- Member's Photo Album: http://www.delica.ca/Photos/
- Vehicle: 1992 Super Exceed/Yamaha Scooter
- Location: North Vancouver
Re: Bushbar rust and repainting
My bushbars fine, yet my mirror is pitting and rusting. It's the Super Exceed, so the chrome is rusting. How would I fix that?
Thanks
Thanks
Keep your tip down and your line tight......happy fishn
Stay away from North Shore RV
Stay away from North Shore RV
-
Golf Cart

- Posts: 857
- Joined: Tue Jul 15, 2008 10:57 pm
- Member's Photo Album: http://www.delica.ca/Photos/
- Vehicle: 1992 Exceed
- Location: Maple Ridge
Re: Bushbar rust and repainting
Try 0000 steel wool. I use it for anything chromed with no scratchingflyfishn wrote:My bushbars fine, yet my mirror is pitting and rusting. It's the Super Exceed, so the chrome is rusting. How would I fix that?
Thanks
If its pitted then you would need to re-chrome. The steel wool will take away the rust stains.
Cheers
By the time you realize that my signature has no real message or life altering words of wisdom, you're too far into it to stop reading until you are finished
-
Lio
- Posts: 5
- Joined: Sat Oct 18, 2008 2:55 pm
- Member's Photo Album: http://www.delica.ca/Photos/
- Vehicle: 93 exceed
Re: Bushbar rust and repainting
i removed my bushbar, with the intent of sandblasting and painting, and found that the bumper was also quite rusty from rock dings. my van was worse than most that i have seen as a result of driving the kootenay roads in the winter. both the bumper and bushbar were very easy to remove with nine bolts holding them both on. the hardest part for me was removing the fog lights and plastic shrouding on the bushbar since the small screws were corroded and easy to strip.
i opted for spray on truck bed liner on the brushbar after having it sandblasted and i used a combination of rattle-can and brush-on pro form rubberized rockergaurd on the bumper after sanding it with 80grit then 120grit
i opted for spray on truck bed liner on the brushbar after having it sandblasted and i used a combination of rattle-can and brush-on pro form rubberized rockergaurd on the bumper after sanding it with 80grit then 120grit
- Attachments
-
- bumper bushbar.jpg (231.83 KiB) Viewed 8822 times
-
BCDelica

- Posts: 1808
- Joined: Tue Jul 18, 2006 4:12 pm
- Member's Photo Album: http://www.delica.ca/Photos/index.php?cat=10008
- Vehicle: WVO Powered Tuk Tuk
- Location: Central Van Isle
- Location: Somewhere with plenty of sun
Re: Bushbar rust and repainting
Big score of originality for the orange bars coaxial, way nifty.
I to went the route of removing the bars and using industrial paint & plastics enamel paint remover followed with a heat gun used with a drill mounted wire brush. With this I wanted to find any of those possible deep rust spots and found a deep rusty crack line on one seam that was ground down and taken to a welder for a just like new touch up; of course followed up with rust inhibbity primer and Tremclad.
I to went the route of removing the bars and using industrial paint & plastics enamel paint remover followed with a heat gun used with a drill mounted wire brush. With this I wanted to find any of those possible deep rust spots and found a deep rusty crack line on one seam that was ground down and taken to a welder for a just like new touch up; of course followed up with rust inhibbity primer and Tremclad.
 Call me BCDelica-less
-
marsgal42

- Posts: 772
- Joined: Fri Jul 20, 2007 3:05 pm
- Member's Photo Album: http://www.delica.ca/Photos/
- Vehicle: The Mighty Gumdrop
- Location: Burnaby, B.C.
Re: Bushbar rust and repainting
One suggestion when it comes time to paint things: when you paint wood, you can slop lots of paint on and the wood will soak it up. You can't do this with metal, it just runs off. Apply only as much as will adhere to the metal and save the rest for another coat.
...laura
...laura
-
Arnold6019
- Posts: 26
- Joined: Fri Dec 07, 2007 9:45 am
- Vehicle: Mitsubishi Delica
Re: Bushbar rust and repainting
I'm really lazy...took it to a powder coating place...removed all the bars on the front side and back...came back a couple days later....voila...wonderful. Probably most expensive method.
-
warmland89
- Posts: 24
- Joined: Thu Aug 16, 2007 8:03 pm
- Vehicle: 1989 Starwood Exceed
- Location: Duncan, BC
- Contact:
Re: Bushbar rust and repainting
I agree with the powder coating method. They sandblasted all the paint and rust off mine and put on a great flat black with a little rough texture. Should outlast the rest of the van. Cost was $140, but I didn't lose an entire Saturday!
1989 Delica Starwood Exceed
Duncan, BC
Duncan, BC
-
Chewy
- Posts: 403
- Joined: Tue Nov 21, 2006 8:56 pm
- Member's Photo Album: http://www.delica.ca/Photos/
- Vehicle: 1995 Suzuki Every VW
- Location: Victoria/ Nanaimo B.C.
Re: Bushbar rust and repainting
On top of what Golf Cart said about steel wool. Use proper SOS pads (the soap impregnated steel wool type NOT plastic ones) wet the surface so you have that extra lubrication and can activate the soap in the pad and go to town on the chrome, detailers not so secret anymore. :D
FS: ' 95 Suzuki Every VW Kombi EFI.
-
Firesong

- Posts: 1363
- Joined: Tue Feb 03, 2009 9:03 am
- Member's Photo Album: http://www.delica.ca/Photos/
- Vehicle: 1998 L400 Delica Chamonix
- Location: Saskatoon
- Location: Saskatoon, SK. Canada
Re: Bushbar rust and repainting
I had a relook at mine that I had done.
I did take a wire attachment / drill to it beforehand
then coated it with POR15 then the armor... (cant remember)
from Can Tire.
We did a little offroading/geocaching on the weekend
and ended up rubbing some paint off the side step in
front of the driver tire. Guess it was a little close to that
approach angle thing.
The paint came off where we didnt' get down to bare metal
Where the coats were right on the metal the paint
was great.
Just a reminder.
In this case it's an easy touchup.
:)
Firesong