I finally got my gauges installed. Pyro/boost/volt .
I wanted it to look as stock as possible. I may color the trim rings black and change the gloss black on the fascia to flat. Otherwise I'm pretty happy with the results.
The filler I used on the fascia trim is epoxy mixed with wood flour. It bonded very well and shaped easily.
The gauge panel is 8mm ply with countertop laminate.
The lighter circuit was handy for switched power and the ashtray light for the gauge lights.
I switched one of the gauge lights with an LED that Paul gave me and its way better color but a titch too bright.
All the climate controls work good and were much easier to move than expected.
I made a neat job of bundling the wires for final installation and used connectors that allow me to remove any gauge without unwiring the whole works.
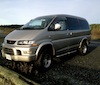
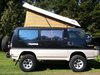
L300 Gauge install
Moderator: BCDelica
-
Artacoma
- Posts: 569
- Joined: Sat Mar 31, 2007 1:51 pm
- Member's Photo Album: http://www.delica.ca/Photos/
- Vehicle: 97 V6 LWB
- Location: Victoria BC
- Location: Victoria BC
L300 Gauge install
- Attachments
-
- IMG_0106-1.jpg (82.57 KiB) Viewed 2858 times
-
- IMG_0104-1.jpg (75.11 KiB) Viewed 2857 times
-
- IMG_0103-1.jpg (71.97 KiB) Viewed 2858 times
-
- IMG_0102-1.jpg (74.53 KiB) Viewed 2856 times
-
- IMG_0099-1.jpg (72.61 KiB) Viewed 2858 times
-
- IMG_0097-1.jpg (76.41 KiB) Viewed 2856 times
-
- IMG_0093.jpg (73.42 KiB) Viewed 2854 times
Rik
97 Series 2 V6 LWB
97 Series 2 V6 LWB
-
Artacoma
- Posts: 569
- Joined: Sat Mar 31, 2007 1:51 pm
- Member's Photo Album: http://www.delica.ca/Photos/
- Vehicle: 97 V6 LWB
- Location: Victoria BC
- Location: Victoria BC
Re: L300 Gauge install
More pics in no reasonable order
Sorry I started taking pics halfway
Move your phone before you start with the spray bomb
Sorry I started taking pics halfway
Move your phone before you start with the spray bomb
- Attachments
-
- IMG_0115.jpg (85.16 KiB) Viewed 2837 times
-
- IMG_0114-1.jpg (70.38 KiB) Viewed 2835 times
-
- IMG_0111-1.jpg (63.58 KiB) Viewed 2837 times
-
- IMG_0110-1.jpg (55.02 KiB) Viewed 2836 times
-
- IMG_0109-1.jpg (93.7 KiB) Viewed 2838 times
-
- IMG_0108-1.jpg (89.48 KiB) Viewed 2839 times
-
- IMG_0107-1.jpg (74.47 KiB) Viewed 2834 times
Rik
97 Series 2 V6 LWB
97 Series 2 V6 LWB
-
Artacoma
- Posts: 569
- Joined: Sat Mar 31, 2007 1:51 pm
- Member's Photo Album: http://www.delica.ca/Photos/
- Vehicle: 97 V6 LWB
- Location: Victoria BC
- Location: Victoria BC
Re: L300 Gauge install
Final pic
Really ......move your phone before spay painting
Really ......move your phone before spay painting
- Attachments
-
- IMG_0116-1.jpg (77.42 KiB) Viewed 2825 times
Rik
97 Series 2 V6 LWB
97 Series 2 V6 LWB
-
after oil
- Posts: 1436
- Joined: Mon Feb 11, 2008 7:01 pm
- Member's Photo Album: http://www.delica.ca/Photos/
- Vehicle: 92 cham-reimo poptop L300. 78MB240D
- Location: on the road
- Location: occupied coast salish territory aka powell river
-
Dingus
- Posts: 83
- Joined: Fri Jun 18, 2010 12:11 pm
- Member's Photo Album: http://www.delica.ca/Photos/
- Vehicle: 03 Tiburon, 04 PT Cruiser
- Location: Edmonton, AB
Re: L300 Gauge install
Nice. I do think the bezels would look nice in black though. Looks quite stock.