Mounting Fog lights
Posted: Fri Feb 23, 2007 8:19 pm
Thoughts I'd share my experiences today...
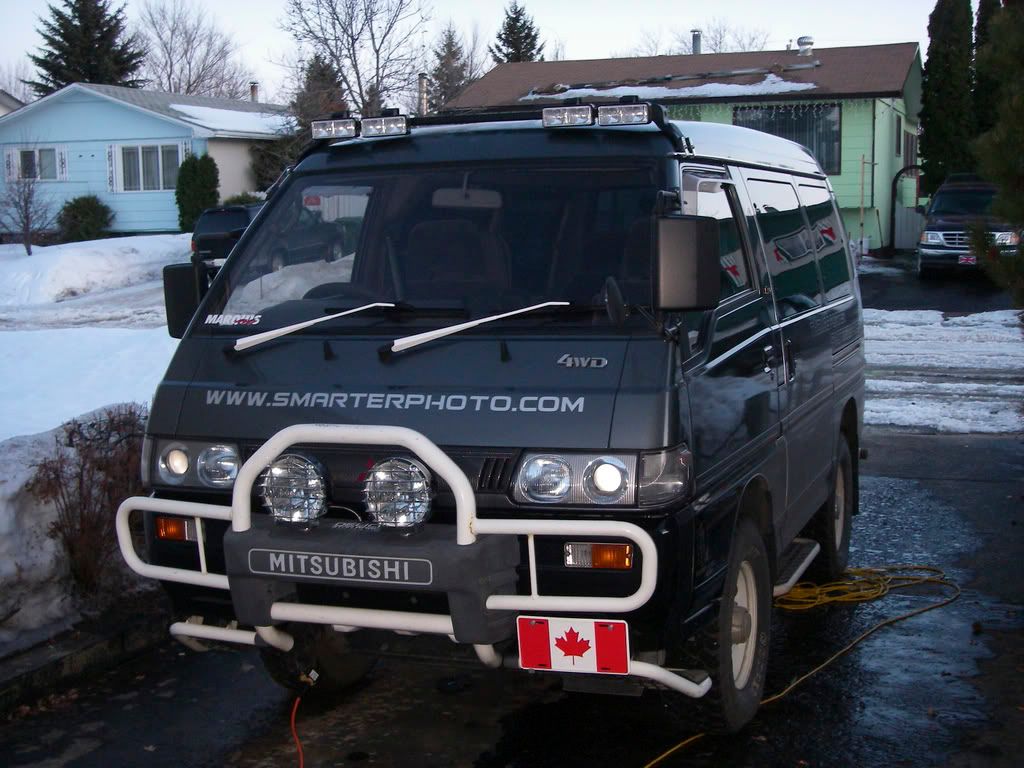
I mounted two 8 inch 100-watt fog/flood lamps on the bull bar of my Delica L300 today, installed a breaker, a relay, and a lit switch.
So...word to the wise. Do not remove the entire winch shield, you don't need to. Just remove the top panel to get started. Be careful not to break the little retainer clips that hold it onto the bull bar supports. Yes, and don't try this when the vehicle is cold - you may crack something...fortunately for me, I had a heated shop to work in today - blizzard outside.
I found that the metal supports underneath the winch cover are a perfect place to drill into for mounting these big foggers. The spacing was right and it's good and solid.
Once the mount holes are drilled through the metal supports, replace the cover and go underneath and mark with a permanent marker through the holes you just drilled into the metal, onto the underside of the winch cover.
Once you have the marks made, remove the winch cover top panel again, turn it upside down to see your pen marks. They will likely fall on the intersection of a plastic support bar on the back side of the panel.
Carefully grind the moulded plastic crossmembers flush with the underside of the panel. Once this is done, put the panel back on the vehicle again and retrace the holes through the metal from underneath.
Once this is done, you can remove it again and safely drill out the in the plastic to match the holes in the metal.
Now is the important piece of info - you must manufacture a spacer that goes between the metal of the brace and the underside of the plastic panel. If you do not, you will tighten up the foglamp bolts from below and the suction down will crack the cover you so carefully marked and drilled.
I made spacers by taking two 1-1/4" washers stacked on top of each other for each side.
I had to grind down the bottom washer a bit to match the slope of the metal support bracket underneath the plastic cover plate. Worked out beautifully I might add.
Now, once the washers/spacers are complete and in place atop the support brackets, carefully replace the plastic winch cover and temporarily use long bolts through the cover, washers and supports to keep everything lined up until you get the lights on.
Oh yeah... I also took the extra precaution to put a piece of foam rubber between the plastic of the cover and the new foglamp base cups to prevent vibration and improve bulb life.
This may not make any sense... I should have taken pictures step by step - but you never think of this when you're experimenting. If I do it again, I'll document the whole thing on camera.
Lastly, you should use an inline fuse or breaker from the battery to the relay - this will be your failsafe if you have a short somewhere. I also installed a relay with a built-in fuse as well. With 4WD vehicles, you can never be too cautious about wires wearing. Use as many fuses as you like and be sure to insulate wire leads from abrasion with something like Lumex or foam...
Also, use a lit switch so you can see that you have your foggers on. I, like many others, couldn't be bothered going into the lighting circuit on the fusebox. I wanted to have the option to have the lights on independantly from the headlights. With the kind of candles we're putting out with this unit now, it was smart to be able to operate them separately from the headlights - don't want any problems with the law...
Anyhooo, if you've got some questions, I'll help you out where I can.
Cheers,
Thomas Porter
http://www.smarterphoto.com