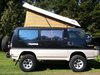
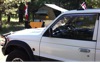
I have been an excited owner of a Delica for almost a month now. And I have had my first breakdown in the 40 degree plus heat in California which resulted from a leaky hose, then an overheated engine that blew the head gasket.
So i am need of a head gasket, according to the mechanic, which was demonstrated when he added more fluids to the radiator and it burped up everywhere in the front of the cab. Therefore the predicament I am in is that i am here in Cali with no place to get parts, no experienced Delica mechanics, but I do possibly have access to tools, a shop and a mechanic's trained eye. Therefore, is there anyone out there that could ship me a head gasket set, which i believe (again according to the mechanic) includes the head gasket, intake manifold gasket, exhaust manifold gasket, new valve stem seals and front something?
I have read through some of the threads and Green 1 mentioned that it is possible to replace the head gasket without dropping the engine. This would obviously save some time. Also, if the head is cracked, fingers crossed that is not, is it possible to replace this without dropping the engine? With all of that could someone go through the procedures of what that entails.
I hope to hear from someone sooon. And let me know if you believe i have overlooked anything.
Thank you for your time and efforts in advance.
peace
dewy
PS does anyone know where i can get a mechanics manual for a Delica 93 Super Exceed?
Don't know of a lead on parts, but you may want to check with someone who deals with Mitsubishi Fuso trucks... the engine may have made it to the US inside one of the Fuso Box trucks... worth a shot. I do know that the Fuso's did have a 2.5L 4cyl turbodiesel at one point. The engine code is 4D56 I believe.
On a manual, I don't know of a '93, but here is a link for one that goes to '92. Contact the seller as he may have something for '93 and later.
I've sent you an extensive PM, but I want to caution you that there is a very strong possibility that your head IS cracked... overheating rarely causes the gasket to go without the head.
it can all be done without removing the engine, however I have never done it myself.
Also check for parts for an '84 (or so) Dodge RAM 50 compact truck with the 4D55 engine, 4D56 being a head upgrade for it. I think this captive import Mitsubishi was the only vehicle offered in the US with this diesel engine.
that's definitely good to know! here is a wikipedia link that may be helpful for any parts houses/mechanics that are helping you in california: http://en.wikipedia.org/wiki/Dodge_Ram_50
ok...
this is a long overdue post, but here it is. And this process started in mid August.
As you may or may not know my automotive skills comprise of changing a tire and the oil, but that is the extent of it, but fortunately i have time, tools and some limited expertise around me but mostly the connections from this web site have provided me with answers. So I am going to try to explain my process to the hurdle I am at now, it in terms from a non-mechanic background. Also my notes are covered with oil grease and are hard to read.
And thank you for all those who have provided me with possible solutions, particularly the previous posts and Marty and Glenn, who are regulars on this site and readily available by phone.
the adventure of replacing the head gasket on Dewy! my first question was where and what is a gasket... as i had no clue!
so my new best friend, Ryan LeBlanc, who i never met before and was recommended to me as a resource down here in Cali came out of the woods literaly and showed up at 8 am and left at 5 am. He has been back a few times but has limited knowledge and like everyone else down here had never seen a Delica before.
Main Objective is to take off the head cylinder to take off the head gasket that is in between the head and the block. straight forward..right!?
?Okay was it just the head gasket or a crack in the head itself. This was the 1500 dollar question. So once I got the head off I took the head with gasket to a trained eye. the gasket looked mildly torn but i would have never seen it. Then it was needed to test the head. Marty recommended just getting a new one because of the volatility of it and it was already off, but he had found one for $1400 which would be calibrated and dial and i learned of another delica that had landed in the Malahat Auto Wreckers and this guy offered it for $1000 as is. But I was in California and shipping that seemed extreme without actually knowing if the head was cracked.
So you ask about finding parts in the states?????? big challenge. I called dozens of different used parts places. quoted the 4D56 engine type that is in a 80s dodge p.up and a older mitsubishi fuso vehicle. But those were all dead ends.
SO testing the head came back with good news, however, Glenn from Coombs County Auto said that he has seen these looking all good but there were cracks up the fuel injector sleeve (all french to me at this time and still is alittle). So Glenn called this recommended machinist in Ukiah, Bob Neilson that i had taken the head to. His conversation scared Bob, of 30 years experience and he sent it to Napa Auto parts for a high pressure water test. This came back with good news. Therefore Glenn shipped a head gasket set for $175 plus shipping down to Bob and he put the rocker bar back on, not calibrated, which I still need advice on. In the process of taking this head off and taking it to Bob, a fuel injector tip broke off and he sent these to another mechanic and he said that 3 were faulty and i therefore had all 4 rebuilt - $350.
Also, I have had some challenges with getting tech manuals. I have four that have been forwarded to me, alas they miss some key components to making this happen. I have uploaded two on my profile and the other two are too big and I can email those to anyone who is interested.
SO the process of taking this bad boy off;
Tools needed;
– 10, 12, 14 & 17 mm open wrenches and sockets
– 10 mm hex driver
– Torque wrench, breaker bar
– Large screwdriver/small crowbar
1. disconnect the battery
2. to get access to the engine with enough clearance you need to take out the drivers seat and i later learned that taking out the passenger seat would be even more helpful, but i got this far without, so it stayed in.
- remove 4 bolts connected to the drivers seat
- remove wingnut cover
- remove 2 screws for the emergency brake cover
- remove 6 bolts to take off panel - 1 w/ bracket closest to door, plus one rubber screw
- disconnect emergency brake wire
- release the straps - 4
- unfasten nuts to release emergency brake cable
- release wire for gas cover by unfastening 2 screws and twisting it thru the slot
3. Now engine stuff - i learned to use tape to match things up later and as you will see, I recommend finding thin latex gloves, the second time around, as the grease stays in your finger nails for weeks. great way to make a first impression as a single guy. ANyway another story..
- remove timing belt shield - 4 bolts
- removing timing belt using tension bearing (small little wheel that pivots towards the spring - loosen the bolts to allow it to pivot - then use large screwdriver or small crowbar)
- remove 3 long steel bolts into the head casing or 4 (messy notes)
- disconnect 2 hoses at back
- disconnect 3 in the front
- remove threaded hose across engine
4. On drivers side
- remove big black hose - the air intake
o remove 1 bolt
o loosen 3 screw clamps
o cut zap strap
- remove shroud (metal triangle thing)
5. Manifolds
- unfasten bolts (driver side) top level - 8 bolts
- remove 8 nuts with washers from the top of the head (bracket at the back) and remove intake manifold
- unfasten 8 bolts from the top of the head
6. Fuel Lines
- loosen 4 fuel lines that are connected to the fuel injectors on the head
- loosen the 2 metal brackets holding them together. Just loosen them to give you ability to work around these tricky guys.
- Loosen top 2 lines from fuel pump. Take them off.
- Loosen bottom 2 lines from fuel pump. Then remove
Remove power from glow plugs
Disconnect rad hose at back
Unfasten bolt that holds dipsticks
Disconnect plug at front of head passenger side
Disconnect ground from fuel pump
Remove power steering pump – 2 bolts (1 short and 1 long)
Remove fuel line from back of head drivers side
Last but not least there is the last of all the last bolts which requires taking off the fan, and the main wheel of the block that moves the fan.
So putting it all back on was just reversing the process. I have upload pictures of most of the ordeal and would be happy to answer if anyone has any questions.
gold star for you dewy!!
thanks for those tips! i hope to never have to do this, especially far from home! do you think you could post the photos in this thread? (in case i do need to)
Awesome post Dewy - well done! Thanks for the written details and the pics in your album. Glad you are up and running again. You sure know more about your bus now eh? Happy motoring
Im reviving this post in hopes to find a solution to Dewys problem.
I just spent almost 3 hours on the phone walking him through the valve adjustment portion of his top end job ( blown head gasket).
We double checked all the timing marks ( actually re and re 'd the timing belt because the timing marks on the pump and cam were out 1 tooth and marks didnt line up) adjusted #1 intake /exhaust, #2 intake, and #3 Exhaust. rotated 360 and the marks come up spot on to finish the rest of the valves adjustments. This is where the problem lies.
#2 exhaust adjustment screw is all the way out and there is still pressure on the valve spring . The cam lobe seams to be 180 degrees out ( as best as Dewy can describe) I referenced #2 exhaust lobe on my Jetta diesel cam and the high side is pointing down. On Dewys his high side of the lobe is between the roller and the rocker arm shaft ( 180 degrees from where mine is) The only thing I can figure is the TDC isnt on #1. and Dewy isnt 100% sure. Could the fix be as simple as taking off the belt and turning the crank 360 , and then hooking up the timing belt ??
Im no mechanic but I'm stumped , and I dont want to second guess for fear of causing internal damage. He's put alot of work into this and I dont want to leave him hanging.
Its getting late so I suggested putting this to the group for some help. I know a few you have helped immensely already, and you have to give Dewy a big pat on the back for even attempting this , but any suggestions would be appreciated.
Thanks
Gregg
By the time you realize that my signature has no real message or life altering words of wisdom, you're too far into it to stop reading until you are finished
forsome reason this post wasnt showing up anywhere
Bump
By the time you realize that my signature has no real message or life altering words of wisdom, you're too far into it to stop reading until you are finished
i took the van out for a test spin yesterday. first time in 3 months after taking on this project. sounded beautiful. a good pat on the back. yet there it was lacking a little juice going up the hills.
any advice on what that may be?
also any advice on what to look at first to check the alternator. yes my batteries are not getting a charge. there are so many wires coming off the batteries. how do you know which one leads to the alternator.
but the van is running and it was a gorgeous day yesterday to take it for a spin. it was a momentous occasion. And i am so grateful to all of those who offered the time and expertise in this process.